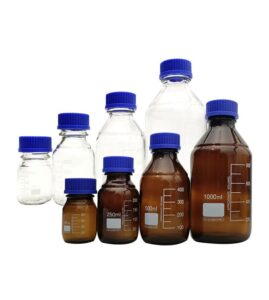
Have you ever caught yourself staring at a reagent bottle in a laboratory, wondering about the proper way to use it? If you’ve been intrigued by this peculiar-looking laboratory glassware but haven’t had a chance to explore its usage, we’re here to help you through.
The reagent bottle, an essential piece of laboratory equipment, is used for storing, mixing, and dispensing chemical reagents. Though it appears simple, handling it with care is crucial for maintaining safety and ensuring precise experimental procedures.
Let’s take a journey through the world of reagent bottles and learn how to use them step-by-step.
Understanding the Basics of a Reagent Bottle
Before we dive into the steps, it’s crucial to understand what a reagent bottle is and its primary functions. Reagent bottles are specifically designed to store chemicals safely, reduce risk during handling, and help carry out scientific experiments efficiently.
Now, let’s break down the process of using a reagent bottle into a series of manageable steps.
Step 1: Inspection of the Bottle
Before using a reagent bottle, always conduct a thorough inspection. Check for any cracks or chips that could lead to leaks or breakage. Also, ensure that the bottle is clean, with no remnants from previous use. If the bottle appears dirty, clean it following appropriate laboratory protocols.
Step 2: Preparing the Reagent
When preparing your reagent for storage or use, make sure to adhere to standard safety guidelines. Always wear appropriate protective equipment, such as lab coats, gloves, and goggles, especially when dealing with hazardous substances.
Step 3: Transferring the Reagent
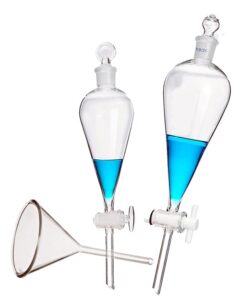
Carefully transfer your prepared reagent into the reagent bottle using a suitable tool, like a funnel for liquid reagents. Ensure that the reagent does not overflow or spill outside the bottle, as this may cause contamination and safety issues.
Step 4: Sealing the Reagent Bottle
After transferring the reagent, secure the bottle with its original cap or stopper. Ensure a tight seal to prevent leakage and evaporation, maintaining the reagent’s integrity.
Step 5: Labeling the Reagent Bottle
Labeling is a crucial step. Clearly write the name of the reagent, the date, and any other relevant information, such as concentration or hazard symbols, on the bottle. This helps maintain organization and ensures safety by informing others about the bottle’s contents.
Step 6: Storing the Reagent Bottle
Once your reagent bottle is ready and labeled, it’s time to store it appropriately. Keep the bottle in a cool, dry place away from direct sunlight and heat. Also, remember to store it in accordance with the specific storage requirements of the reagent. Certain reagents may require refrigeration, while others should be kept away from specific substances to avoid potential reactions.
Step 7: Using Reagent from the Bottle
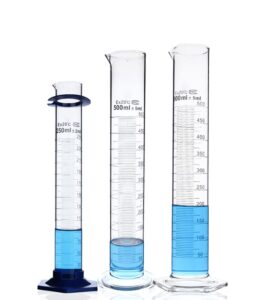
When it’s time to use the reagent, carefully open the bottle, making sure not to spill any. Use the necessary lab equipment like pipettes, droppers, or measuring cylinders to extract the required amount of reagent from the bottle. Once you’ve taken what you need, securely seal the bottle again to prevent any contamination.
Step 8: Cleaning and Reusing the Reagent Bottle
Once the reagent in the bottle is depleted, it can be cleaned and reused. Depending on the nature of the reagent stored, cleaning procedures can vary. However, a common method is rinsing the bottle multiple times with distilled water, followed by a thorough drying process.
Remember, it’s essential to adhere strictly to safety guidelines when cleaning reagent bottles, especially those that contained hazardous reagents.
Additional Tips and Best Practices
After exploring the fundamental steps of using a reagent bottle, it’s beneficial to delve into some additional tips and best practices. These pointers can make your experience with reagent bottles more efficient and safe.
Select the Correct Type of Reagent Bottle
Always choose the right type of reagent bottle that suits your needs. There are various types of reagent bottles available, made from different materials like glass or plastic, and they come in different shapes and sizes. Depending on the nature and quantity of the reagent, the selection of the bottle can vary.
Beware of Cross-Contamination
Cross-contamination can interfere with the accuracy of your experimental results. Always use a clean, dry tool when transferring reagents from the bottle.
Handle with Care
Always handle reagent bottles with care. Remember, they contain chemicals that can be hazardous. Never hold the bottle by the cap or stopper as it could lead to spillage.
Dispose of Waste Properly
It’s crucial to dispose of any waste from your reagent bottles properly, according to local regulations and institutional guidelines. Some chemicals can be harmful to the environment and must be treated before disposal.
Emergency Situations
In case of any emergency, such as spillage or breakage of a reagent bottle, always follow your laboratory’s emergency response procedures. Ensure that you are aware of the location and proper use of safety equipment, such as eyewash stations and safety showers.
Using a reagent bottle may seem like a straightforward process, but each step carries significant importance in maintaining safety and ensuring successful experiments. The goal of these steps is to help you build confidence in handling reagent bottles while understanding their importance in a laboratory setting. The next time you come across a reagent bottle, you’ll be fully equipped to use it with ease and accuracy.


