Calibration of laboratory glassware: why does this meticulous process form the bedrock of experimental integrity in scientific research? This question underscores the significance of calibration in ensuring the precision and validity of laboratory experiments.
In this comprehensive guide, we delve into the technicalities of lab glassware calibration, elucidating its critical role in maintaining the rigor and accuracy of scientific measurements. Precision in laboratory procedures is not just a requirement; it’s a commitment to the fidelity of scientific discovery.
Embark on an in-depth exploration of the nuances of lab glassware calibration.
Calibration: The Keystone of Laboratory Accuracy
Laboratory glassware, including graduated cylinders, pipettes, and volumetric flasks, is fundamental to quantitative analysis. However, the integrity of experimental data hinges on the accuracy of these instruments.
Calibration aligns laboratory measurements with recognized standards, ensuring that volumetric readings are not just close, but exact. This is critical in quantitative analyses where even negligible deviations can lead to significant errors in results.
- Ensuring Measurement Accuracy: Laboratory glassware is a fundamental measuring tool, and its accuracy and reliability are vital for the credibility of experimental results. Calibration identifies and corrects errors in the instruments, ensuring the accuracy and repeatability of measurements.
- Compliance with National Regulations and Standards: According to national regulations and standards, laboratory glassware must be verified by authoritative metrological institutions and possess stable and reliable characteristics. Calibration ensures that the instruments meet these national standards, maintaining their quality and performance.
- Improving Work Efficiency and Experimental Quality: Calibrating glassware can reduce experimental errors caused by instrument inaccuracies, thereby enhancing the precision and efficiency of experiments. Accurate measurements provide reliable data for innovation and development in research, production, and other fields, improving the quality and level of experiments.
- Ensuring Laboratory Safety: Glassware in use may pose safety hazards, such as breakage or explosion. Calibration helps identify and address these issues, allowing for timely repair or replacement of the equipment, thus preventing accidents and ensuring laboratory safety.
- Meeting Industry Norms and Requirements: Different industries have varying requirements for glassware use. For example, laboratories in medical, food, and environmental sectors require glassware of higher precision and more stable performance. Calibration ensures that the instruments meet industry-specific standards, ensuring their safe and effective use.
Optimizing Laboratory Precision: Key Factors Influencing the Accuracy of Glassware Instruments
In the realm of scientific experimentation, the accuracy of laboratory glassware is a cornerstone for reliable and valid results. Understanding the factors that influence this accuracy is pivotal for any laboratory aiming to maintain high standards of precision.
Factors Affecting the Accuracy of Glassware Instruments
- Manufacturing Process: During the manufacturing of glassware, there may be some defects such as bubbles, streaks, or stones. These defects can affect the transparency, uniformity, and thermal resistance of the glassware, thereby impacting its accuracy.
- Usage Methods: Improper use can also affect the accuracy of glassware. For example, if the instrument is not calibrated or uses inappropriate calibration standards during measurement, it could lead to measurement errors. Additionally, incorrect handling can cause damage to the instrument or lead to inaccurate measurements.
- Environmental Factors: Environmental conditions can also impact the accuracy of glassware. Changes in temperature and humidity may cause deformation or breakage of the glassware, affecting its accuracy. Moreover, pollutants in the air can react with the surface of the glassware, leading to deterioration or measurement inaccuracies.
- Instrument Cleaning and Maintenance: The cleanliness and maintenance of glassware are critical for its accuracy. If there are dirt, residues, or fingerprints on the surface of the instrument, it can affect its transparency, uniformity, and measurement accuracy. Regular cleaning and maintenance are crucial to maintain its accuracy.
- Operator Handling: The way personnel handle the glassware can also impact its accuracy. Errors in reading and recording data due to improper handling or misjudgment by the personnel can lead to measurement errors. Furthermore, the fatigue and mental state of the personnel can also affect the operation and measurement results.
The accurate calibration and use of laboratory glassware are critical for the success and reliability of scientific experiments. By being aware of and addressing the various factors that can affect glassware accuracy, laboratories can significantly enhance their experimental precision and validity. This proactive approach not only improves the quality of scientific research but also upholds the standards of experimental rigor and integrity.
How Different Glass Types Impact Laboratory Experiments
In the intricate world of laboratory experiments, the choice of glassware is not just a matter of availability or preference, but a strategic decision that can significantly influence the results of an experiment. The different types of glass used in the lab have distinct properties, each impacting experimental outcomes in unique ways.
Understanding the Influence of Glass Types on Experimental Outcomes
From standard glass to specialized quartz and borosilicate varieties, each type of glass brings its own set of characteristics to the laboratory table. Their varying levels of heat resistance, transparency, and chemical stability play a pivotal role in determining the suitability of glassware for specific experimental conditions.
- Standard Glass: Standard glass is a common type of glass used widely in laboratories and households. It has high transparency, heat resistance, and cold resistance, suitable for most experimental operations. However, standard glass tends to soften at high temperatures, making it unsuitable for experiments requiring high-temperature conditions.
- Borosilicate Glass: Borosilicate glass, known for its high heat resistance, is extensively used in laboratories and industrial settings. It can withstand significant temperature and pressure fluctuations, making it ideal for experiments that require high temperatures, such as melting point determination and chemical reactions.
- Quartz Glass: Quartz glass, made from pure silica, boasts extremely high heat resistance and acid resistance. It is suited for experiments under extreme conditions like high temperatures, strong acids, or bases, such as high-temperature chemical reactions and spectroscopic analysis.
- Ultraviolet (UV) Protective Glass: UV protective glass absorbs or reflects UV rays. It prevents the interference of ultraviolet light in experimental procedures, making it suitable for experiments where UV light interference must be avoided, like photochemical reactions and fluorescence measurements.
- Optical Glass: Optical glass, known for its high transparency, heat resistance, and cold resistance, is widely used in optical instruments and precision measurement fields. It is ideal for experiments requiring high precision measurements, such as optical interference and spectroscopic analysis.
The selection of the appropriate type of glass is a critical step in the design and execution of laboratory experiments. Understanding the unique properties and applications of each glass type ensures not only the accuracy and reliability of experimental results but also enhances the overall efficiency and safety of laboratory operations. This careful consideration of glassware types underscores the meticulous nature of scientific research and experimentation.
Key Laboratory Glassware Requiring Routine Calibration
The necessity for regular calibration extends to several key types of laboratory glassware. Instruments such as burettes, pipettes, volumetric flasks, and graduated cylinders are indispensable in experiments, and their accuracy directly influences the reliability and credibility of the research findings. The calibration process, encompassing both volume and accuracy checks, is essential for maintaining the precision of these instruments under standard laboratory conditions.
The key glassware needing routine calibration includes:
- Burettes: Burettes are used for titration experiments where precise measurement of liquid volumes is essential. Regular calibration helps maintain their accuracy, especially since they play a critical role in determining concentrations in various solutions.
- Pipettes (Graduated and Single-Volume): Pipettes, both graduated and single-volume types, are fundamental in transferring specific volumes of liquids. Accurate calibration is necessary to ensure that the volume transferred is precise, as even minor inaccuracies can significantly impact experimental outcomes.
- Volumetric Flasks: Volumetric flasks are used for preparing solutions of precise volumes and concentrations. Calibration of these flasks ensures that the volume they hold matches their labeled capacity, which is vital for the preparation of standard solutions in quantitative analysis.
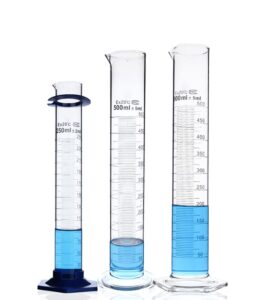
- Graduated Cylinders and Measuring Cups: These instruments, while not as precise as burettes or pipettes, still require regular calibration for tasks where approximate volume measurements are acceptable.
Calibration of these instruments usually involves methods like gravimetric analysis and comparative analysis. It’s important to consider the impact of temperature, as the volume of liquids can vary with temperature changes. Therefore, conducting calibration under standard laboratory conditions is recommended for more accurate results.
Additionally, special glass instruments, such as glass electrodes used for pH measurements and glassware used at extreme temperatures, also require regular calibration. These instruments can be affected by factors like temperature variations, which can influence the glass’s expansion coefficient and thermal stability.
Accuracy calibration is also necessary for instruments like burettes and pipettes used for concentration measurements. This involves using standard solutions of known concentrations and adjusting the instrument if discrepancies are found between the measured and standard values.
Key considerations during glassware calibration include:
- Selecting appropriate calibration methods and standards.
- Using suitable equipment and materials and following prescribed operating procedures.
- Ensuring the calibration environment meets specific conditions, like temperature and humidity.
- Recording comprehensive calibration data and results for assessment and reporting.
- Properly managing and maintaining calibrated glassware to ensure its long-term optimal performance.
The regular calibration of laboratory glassware is not just a procedural formality but a fundamental aspect of maintaining the integrity and accuracy of scientific research. By adhering to a systematic calibration schedule, laboratories can ensure the reliability of their measurements and the overall success of their experimental endeavors. This practice is crucial for upholding the standards of scientific investigation and for the advancement of knowledge in various fields.
Step-by-Step Guide to Calibrating Laboratory Glassware for Accurate Measurements
Calibrating laboratory glassware is a fundamental procedure in scientific research, ensuring the precision and reliability of measurements. This process involves several critical steps, each contributing to the accuracy of the glassware and, subsequently, the validity of experimental results.
Detailed Procedure for Glassware Calibration in Laboratories
Starting with determining the calibration range and selecting the appropriate medium, the calibration process is systematic and thorough. Each step, from preparing the necessary equipment to recording and processing the calibration data, plays a vital role in achieving the desired accuracy. Additionally, the calibration procedure must be adapted to the specific type of glassware and its unique requirements, ensuring that the calibration is both accurate and reliable.
- Determine Calibration Range: Based on experimental needs and the precision requirements of the instrument, identify the range of glassware instruments that need calibration. Different types of glassware have varying calibration ranges.
- Select Calibration Medium: Choose an appropriate calibration medium according to the experiment requirements and the characteristics of the instrument. For instance, water is a common medium suitable for most glassware.
- Prepare Calibration Equipment: Prepare necessary calibration equipment like balances, weights, thermometers, and stopwatches. Ensure these tools are calibrated and certified for accuracy.
- Clean the Glassware: Before beginning calibration, thoroughly clean the glassware to remove impurities and residues. This step is crucial for enhancing the accuracy and reliability of the calibration.
- Establish Calibration Conditions: Set the required calibration conditions, such as temperature, humidity, and pressure, which can affect the calibration results.
- Perform Calibration: Follow the specified procedures and conditions during the calibration process. For volumetric flasks and burettes, perform leakage tests and calibration operations. For other types of instruments, conduct appropriate calibration procedures based on their specific characteristics.
- Record Calibration Results: Document the calibration results, including details like the name, model, number of the instrument, calibration date, and personnel involved. This information aids in tracking and analyzing the performance and status of the instrument.
- Process Calibration Data: Analyze and process the calibration data as required. For volumetric flasks and burettes, calculate their capacity and error based on the calibration results. For other types of instruments, perform relevant data processing and analysis.
- Adjust Based on Calibration Results: After processing the calibration data, make necessary adjustments. If significant errors or issues are discovered, repair or replace the instrument accordingly.
- Verify Calibration Results: Finally, validate the calibration results. This can be done by re-measuring the same data set or comparing it with other instruments to ensure the reliability of the calibration. If the verification results meet the requirements, the instrument’s accuracy and reliability are confirmed.
The calibration of laboratory glassware is a meticulous and essential task that cannot be overlooked. By following these detailed steps, scientists and laboratory technicians can ensure that their instruments are calibrated correctly, thereby maintaining the integrity of their experimental data. This guide serves as a comprehensive reference for anyone looking to calibrate their laboratory glassware accurately, ensuring the success and credibility of their scientific endeavors.
Addressing Common Calibration Pitfalls and Their Solutions
Adding to the depth of this guide on laboratory glassware calibration, it’s important to consider the potential pitfalls in the calibration process. Being aware of common mistakes and understanding how to avoid them is just as crucial as knowing the correct calibration procedures.
- Ignoring Environmental Factors: The accuracy of calibration can be greatly influenced by the laboratory environment. Conduct calibration under conditions similar to those of actual experiments to avoid inaccuracies due to temperature and humidity fluctuations.
- Using Improper Calibration Standards: Calibration with inappropriate or uncertified standards can compromise accuracy. Always use certified standards that are specifically suited to the type of glassware and the intended experiment.
- Neglecting Regular Maintenance: Overlooking the cleanliness and maintenance of glassware can introduce errors. Implement a routine of regular cleaning and inspection to maintain the integrity of the instruments.
- Inadequate Training of Personnel: Human error is a common source of calibration mistakes. Proper and regular training for laboratory personnel can significantly reduce such errors.
- Overlooking the Need for Recalibration: Regular use and environmental changes can affect the accuracy of glassware. Adhere to a scheduled recalibration plan to ensure ongoing accuracy.
Understanding and avoiding these common calibration errors is integral to maintaining the precision and reliability of laboratory experiments. As we’ve explored the various aspects of glassware calibration, incorporating these best practices will enhance the accuracy of your scientific endeavors. Remember, meticulous calibration is the cornerstone of reliable and credible research outcomes.
Calibration of Laboratory Glassware: Methods and Frequency for Optimal Accuracy
The calibration of glassware in a laboratory setting is a fundamental process to ensure the accuracy and reliability of scientific measurements. This procedure, encompassing various methods and specific frequencies, is critical for maintaining the precision of glassware used in experimental research.
Effective Calibration Techniques and Scheduling for Laboratory Glassware
Utilizing precise calibration instruments and spectrophotometric analysis are key methods for calibrating laboratory glassware. These techniques ensure that each glassware piece meets the required standards for experimental use. Additionally, determining the appropriate calibration frequency is essential, with guidelines suggesting calibration before initial use and at regular intervals thereafter, especially for glassware in frequent use.
- Precision Instrument Calibration: Using precise and reliable measuring instruments, such as the CAL1000 laboratory measurement controller, for calibrating glassware. This method effectively guarantees the measurement accuracy of the glassware. These measuring instruments can assess various attributes of the glassware, like temperature, relative humidity, window area, transparency, and strength, ensuring accuracy and stability in measurement results.
- Spectrophotometric Calibration: This involves comparing the spectral peak values and characteristic curves of the glassware with original values and adjusting the glassware to meet calibration standards. This method is suitable for various types of glassware, including flasks, beakers, and volumetric flasks.
The calibration frequency should be determined based on the usage and performance requirements of the glassware. Generally, new glassware should be calibrated before use to ensure its accuracy and reliability. For frequently used instruments, it is recommended to calibrate them every six months to a year. If any abnormalities or errors are detected during use, the instrument should be immediately stopped from use and calibrated or repaired.
When selecting a calibration service, it is important to choose an organization with the relevant qualifications and experience to ensure the accuracy and reliability of the calibration. Additionally, the organization should have comprehensive calibration equipment and testing technology, capable of calibrating according to relevant standards and methods, and providing accurate calibration reports.
Besides these calibration methods, other auxiliary measures can also ensure the accuracy and reliability of glassware. For example, before using glassware, check its appearance quality and specifications to ensure compliance; follow correct operating methods during use to avoid accidents like collisions or falls; and when storing, pay attention to cleanliness, dustproofing, and moisture-proofing to prevent moisture, mold, or corrosion.
The meticulous calibration of laboratory glassware is vital for the integrity of scientific research. By adhering to established methods and regular calibration schedules, laboratories can guarantee the accuracy and reliability of their experiments. Proper calibration, coupled with regular maintenance, forms the cornerstone of high-quality scientific experimentation and research.
Frequently Asked Questions About Lab Glassware Calibration
Q1: How often should laboratory glassware be calibrated?
- A1: Laboratory glassware should be calibrated before its first use and then at regular intervals, typically every six months to a year, depending on the frequency of use and the specific requirements of the experiments.
Q2: What are the most accurate methods for calibrating lab glassware?
- A2: The most accurate methods include gravimetric analysis for volumetric instruments and spectrophotometric calibration for glassware used in optical measurements. The choice of method depends on the type of glassware and the precision required.
Q3: Can temperature and humidity affect the calibration of glassware?
- A3: Yes, temperature and humidity can significantly impact the accuracy of calibration. Calibrations should be performed under environmental conditions similar to those in which the experiments will be conducted.
Q4: What are the consequences of using improperly calibrated glassware in experiments?
- A4: Using improperly calibrated glassware can lead to significant errors in experimental results, affecting the reliability and validity of research findings.
Q5: How can I ensure the calibration of my lab glassware is accurate?
- A5: Ensure calibration accuracy by using certified and appropriate standards, conducting calibration under controlled environmental conditions, and employing calibrated instruments for measurement. Regular training for laboratory personnel and routine maintenance of glassware are also essential.
Q6: Are there any special considerations for calibrating glassware used in sensitive experiments?
- A6: Yes, for sensitive experiments, it’s crucial to use high-precision calibration methods and to frequently check the calibration status, especially for experiments requiring high accuracy, such as quantitative chemical analysis.
Q7: Is it necessary to calibrate new laboratory glassware?
- A7: Yes, new laboratory glassware should be calibrated before its first use to ensure its accuracy and reliability for experimental purposes.
Conclusion
The calibration of laboratory glassware is an indispensable practice in the realm of scientific research, crucial for achieving precise and reliable experimental results. Embracing this guide will not only enhance the quality of your research but also uphold the highest standards of scientific rigor. Remember, precision in the lab starts with the right calibration – an investment in the credibility and success of your scientific endeavors.


