Have you ever wondered how scientists and researchers measure tiny volumes of liquid with precision? Or perhaps, you’re a budding scientist yourself, embarking on the path of experimental research. The answer lies in a seemingly simple yet vital tool: the pipette.
In the world of laboratory science, pipettes are akin to an artist’s paintbrush. They are essential for conducting experiments that require exact measurements of liquids. But how do you use them correctly to ensure precision and avoid costly errors?
Let’s embark on a journey to demystify the art of pipetting.

What Are Pipettes and Why Are They Important?
Pipettes are essential instruments used in laboratories for accurately measuring and transferring small volumes of liquids. The design of a pipette typically includes a slender tube that can draw up and release specific volumes of liquid with high precision. This functionality is critical in various scientific fields, including chemistry, biology, medicine, and pharmacology, where exact quantities of fluids need to be handled for experiments and analyses.
The importance of pipettes lies in their ability to ensure accuracy and consistency in experiments. The precision of liquid measurements directly affects the reliability of experimental results. For instance, in chemical reactions, the quantities of reactants need to be precisely controlled to predict the outcome accurately. In biological experiments, such as DNA sequencing or drug development, the exact volume of reagents and samples is crucial for the validity of the results.
Furthermore, pipettes minimize the risk of contamination when transferring liquids. They allow scientists to work with small volumes, reducing waste and saving costs on expensive reagents. Advanced pipettes also offer ergonomic benefits, reducing the risk of repetitive strain injuries for laboratory personnel who perform frequent pipetting.
Pipettes are vital tools in scientific research and analysis. Their precision and efficiency make them indispensable in achieving accurate, reliable, and reproducible results in various laboratory settings.
Types of Pipettes
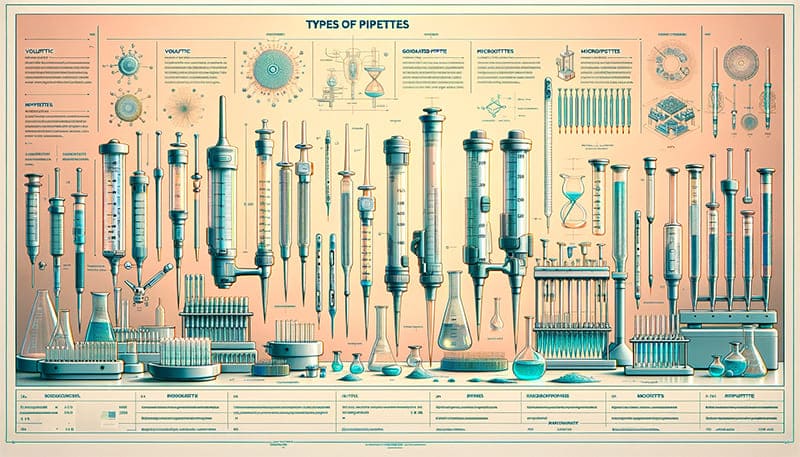
Pipettes come in various forms, each suited for specific tasks:
The Information about Different Types of Pipettes
| Type of Pipette | Material | Characteristics | Application Scope | Usage Method |
|---|---|---|---|---|
| Volumetric Pipettes | Glass or Plastic | Designed for precise measurement of a single, fixed volume. | Ideal for standard solutions in titration and quantitative analysis. | Fill to the calibration mark, then release the liquid to the desired container. |
| Graduated Pipettes | Glass or Plastic | Marked with graduations for measuring different volumes. | Used in various laboratory settings for measuring variable volumes. | Adjust the volume by reading the graduations and controlling the liquid level. |
| Micropipettes | Plastic and Metal | Small, handheld devices for very small volumes (microliter range). | Common in molecular biology, microbiology, and chemical analysis. | Set the desired volume, aspirate by pressing the plunger, and dispense. |
Understanding the type of pipette needed for your specific task is crucial. Each type has its unique features and applications.

A Comprehensive Guide to Using Pipettes in the Laboratory
Mastering the fundamental techniques of pipetting – a skill essential for precision and efficiency in the lab. Whether you’re a seasoned professional or just starting out, this guide is designed to enhance your understanding and proficiency in using pipettes. Together, let’s explore the best practices and safety measures that will elevate your laboratory skills to new heights.
Here is how to use them:
Preparation Phase
- Check the Pipette: Before using, inspect the pipette for integrity, ensuring there are no cracks or damage. Verify that the scale is clear and accurate.
- Choose the Right Container: Select an appropriate container for the liquid volume and type, such as a conical flask or beaker with a ground glass stopper.
- Clean the Pipette: Clean any residue or dirt inside the pipette using suitable cleaning agents and water, then dry it with a clean cloth.
- Prepare the Standard Solution: Prepare the required amount of standard solution for the experiment and pour it into the pipette, ensuring not to exceed its capacity.
Operation Phase
- Adjust Pipette Height: Place the pipette at a comfortable height for visibility. Adjust the zero scale line to be level with the container’s bottom.
- Transfer Liquid: Tilt the pipette to allow the liquid to flow gently, maintaining eye level with the liquid surface for accurate reading. For half-drop operations, block the tip with a cleaned rubber tube, tilt the pipette to let the solution form a half-drop, and tap the tip against the flask to ensure smooth flow. Control the size and shape of the half-drop.
- Read the Scale: Keep your eyes level with the liquid surface when reading the scale to avoid inaccuracies due to angled viewing. Use the lowest or highest point of the meniscus for concave or convex surfaces, respectively.
- Repeat if Necessary: Clean and dry the pipette after each transfer if multiple samples are needed.
Completion Phase
- Clean the Pipette: After use, promptly clean the pipette to remove any residues. Use suitable cleaning agents and water, and dry with a clean cloth.
- Storage: Store the pipette in a dry, cool place away from direct sunlight or high temperatures to preserve its accuracy and lifespan.
- Inspect: Post-use, check for any issues like damage or inaccurate scales, and repair or replace as needed.
Safety Precautions
- Handle the pipette carefully to avoid cuts or breakage, especially during cleaning.
- If using electric heating devices, ensure the power cords are not damaged to prevent electrical hazards.
- Wear protective gear when measuring toxic or corrosive liquids. Ensure tight seals between containers and pipettes to prevent leaks.
- Clean up the workspace promptly after experiments, disposing of hazardous waste according to regulations.
- Avoid exposing pipettes to extreme temperatures or direct sunlight, and handle them gently to maintain accuracy and longevity.
I hope this guide has provided you with a clear and comprehensive understanding of how to effectively use pipettes in the laboratory. By following these guidelines, you can ensure precise and safe measurements, contributing to the success and accuracy of your scientific experiments. Remember, mastery of such fundamental tools is key to achieving excellence in the laboratory.

Pipette Calibration: Ensuring Measurement Accuracy
A critical aspect of pipetting that must not be overlooked is the calibration of pipettes. Regular calibration is essential for maintaining the accuracy and reliability of your measurements. Here’s what you need to know about pipette calibration:
Importance of Calibration
- Accuracy and Reliability: Calibration ensures that the pipette dispenses the correct volume, which is crucial for the integrity of experimental results.
- Compliance with Standards: Regular calibration is often required to comply with laboratory accreditation standards and quality control protocols.
Frequency of Calibration
- Routine Calibration: The frequency of calibration can depend on how often the pipette is used and the level of precision required by your experiments. As a general rule, pipettes should be calibrated at least once a year.
- High-Usage Calibration: For pipettes used daily or in critical procedures, more frequent calibration (e.g., every 3-6 months) is advisable.
- Post-Maintenance Calibration: It’s also important to recalibrate pipettes after any repair or maintenance work.
Who Should Perform Calibration
- Trained Professionals: Ideally, calibration should be performed by trained professionals who specialize in pipette calibration. They use calibrated weights and specialized equipment to ensure high accuracy.
- Lab Technicians: In some settings, trained lab technicians can perform basic calibrations, especially for less precise applications. However, they should be properly trained and follow standardized procedures.
- External Calibration Services: Many laboratories opt to send their pipettes to external services for calibration, ensuring adherence to international standards and reducing the risk of bias.
Calibration Process
- Pre-Calibration Checks: Before calibration, check the pipette for any physical damage and clean it thoroughly.
- Using Calibration Equipment: The calibration process typically involves using a balance and a specific calibration liquid (usually water) at a controlled temperature.
- Volume Measurements: The pipette is used to dispense multiple volumes of liquid, which are weighed and compared against expected values.
- Adjustments: If discrepancies are found, adjustments are made to the pipette’s settings to correct the volume dispensed.
- Documentation: After calibration, document the results and any adjustments made for future reference and compliance purposes.
Post-Calibration Considerations
- Verification: Following calibration, it’s a good practice to verify the accuracy of the pipette with a few test measurements.
- Handling and Storage: Proper handling and storage of the pipette are essential to maintain its calibration. Avoid dropping or jarring the pipette, and store it in a vertical position.
Incorporating regular pipette calibration into your laboratory routine is crucial for ensuring the accuracy of your experiments. It’s an investment in the quality and reliability of your scientific work.
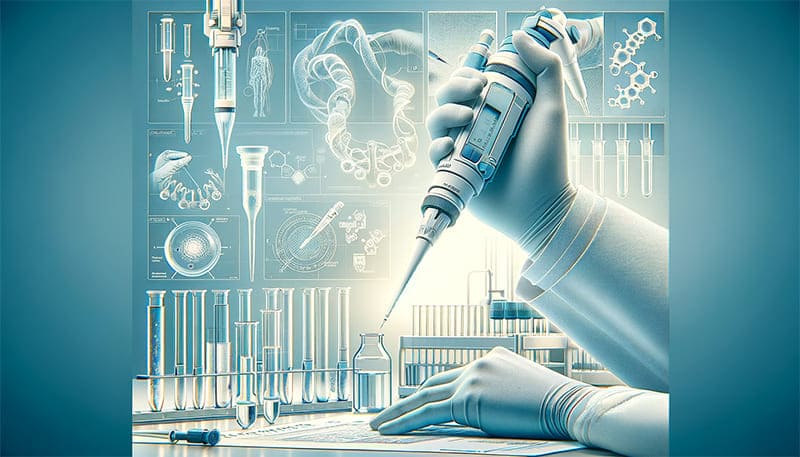
Pipetting Technique: Mastering the Precision
Pipetting, while seemingly straightforward, is a skill that requires attention to detail and practice. Here are the steps and considerations for mastering the proper pipetting technique:
- Holding the Pipette:
- Grip the pipette like a pencil, with your thumb on the plunger and your index and middle fingers supporting the body.
- Ensure your hand is relaxed to avoid strain during repetitive pipetting.
- Setting the Volume (for adjustable pipettes):
- Carefully adjust the dial to set the desired volume. Make sure to check the volume setting before each use.
- Attaching the Tip:
- Firmly press the pipette into the tip. Avoid touching the tip with your hands to prevent contamination.
- Pre-Wetting the Tip:
- Aspirate and dispense the liquid a couple of times before the actual measurement. This helps in achieving a more accurate volume, especially for volatile liquids.
- Angle of Aspiration:
- When aspirating liquid, hold the pipette vertically to ensure accurate volume uptake.
- Immerse the tip slightly into the liquid, not too deep to avoid contamination and not too shallow to prevent air intake.
- Aspirating the Liquid:
- Gently press the plunger to the first stop.
- Slowly release the plunger to draw the liquid up into the tip. A controlled, steady pace is key to accuracy.
- Pause After Aspiration:
- After aspirating, pause for a moment to allow the liquid to settle in the tip. This ensures that the correct volume is measured.
- Angle of Dispensing:
- When dispensing, touch the tip to the side of the receiving vessel.
- Tilt the pipette slightly (at about a 10-45 degree angle) to help with complete liquid dispensing.
- Dispensing the Liquid:
- Press the plunger smoothly and steadily to the first stop to dispense the liquid.
- For complete dispensing, press the plunger to the second stop. But be cautious with this step, as pressing too hard or too fast can lead to splashing or mixing of air bubbles.
- Releasing the Tip:
- Eject the tip into an appropriate waste container without touching the ejector with your hands.
- Speed of Operation:
- Both aspiration and dispensing should be done at a steady, controlled speed. Rushing these steps can lead to inaccurate measurements and potential splashing.
By following these detailed steps, you can enhance the accuracy and efficiency of your pipetting technique. Remember, practice is crucial in mastering these skills, and consistency in your technique will lead to more reliable results in your laboratory work.
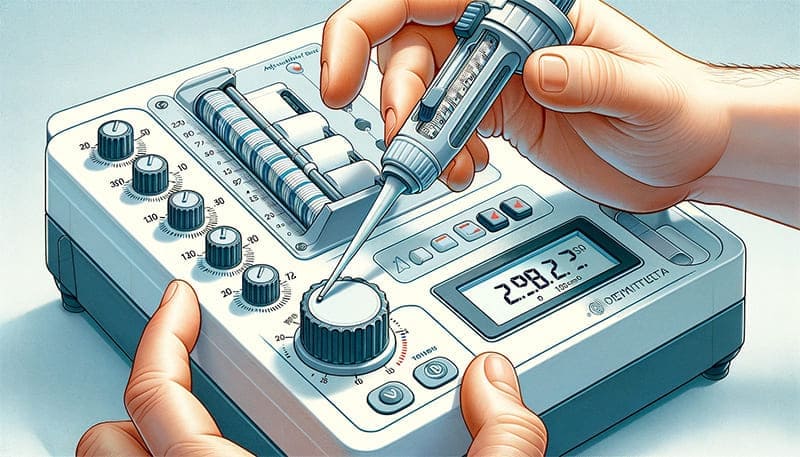
Volume Adjustment in Adjustable Pipettes
Adjustable pipettes are versatile tools in the laboratory, allowing for the measurement and transfer of different volumes of liquid. Correctly setting the desired volume on these pipettes is vital to ensure accurate and precise measurements. Here’s a step-by-step guide to properly adjust the volume on an adjustable pipette:
Understanding the Volume Adjustment Mechanism
- Dial or Button System: Most adjustable pipettes have a dial or a set of buttons that allow you to set the desired volume. The display usually shows the volume in microliters (μL) or milliliters (mL).
Steps for Volume Adjustment
- Identify the Volume Range: Before adjusting, know the volume range of your pipette. Each pipette is designed to operate within a specific range (e.g., 10 μL to 100 μL). Using the pipette outside of this range can lead to inaccuracies.
- Unlock the Adjustment Mechanism: Some pipettes have a locking mechanism to prevent accidental volume changes. If present, unlock this mechanism before adjusting the volume.
- Adjusting the Volume:
- For a dial system, turn the dial until the desired volume is displayed on the pipette’s digital or analog readout.
- For a button system, press the appropriate buttons to increase or decrease the volume reading.
- Make adjustments slowly and carefully to avoid overshooting the desired volume.
- Lock the Volume Setting: If your pipette has a locking mechanism, re-engage it after setting the desired volume to prevent accidental changes during use.
- Double-Check the Volume: After adjusting, double-check the display to ensure the correct volume is set. This is crucial to avoid measurement errors.
Tips for Accurate Volume Adjustment
- Avoid Extreme Ranges: Try not to set the volume at the very top or bottom of the pipette’s range, as accuracy can decrease at these extremes.
- Regular Calibration: Regular calibration checks will help ensure that the volume displayed corresponds accurately to the volume dispensed.
- Gentle Handling: Handle the adjustment mechanism gently to avoid wear and tear, which can impact the pipette’s accuracy over time.
Common Mistakes to Avoid
- Rapid Adjustments: Avoid rapidly turning the dial or pressing buttons, as this can lead to inaccurate settings.
- Forcing the Mechanism: Never force the dial or buttons if they seem stuck. This could damage the internal mechanism of the pipette.
By following these guidelines, you can accurately set the volume on an adjustable pipette, ensuring precise measurements in your laboratory experiments. Remember, taking the time to set the volume correctly is key to maintaining the integrity of your scientific work.
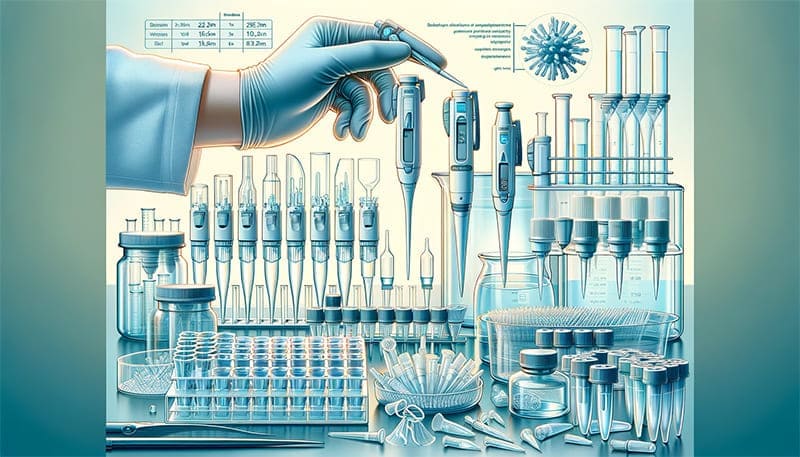
Tip Selection and Use: Key to Accurate Pipetting
The correct selection and use of pipette tips are critical for ensuring accuracy and preventing contamination in pipetting tasks. A mismatched or improperly used tip can lead to significant errors in volume measurements. Here’s a guide on how to select and use pipette tips correctly:
Choosing the Right Pipette Tip
- Compatibility: Ensure the tip is compatible with your pipette. Using tips designed for your specific pipette brand and model is recommended for optimal performance.
- Volume Range: Select a tip that matches the volume range of your pipetting task. Using a tip that’s too large or too small for the volume you’re working with can affect accuracy.
- Material and Quality: Opt for high-quality tips made of materials that are chemically inert and free from contaminants. This is especially important for sensitive experiments.
- Sterile or Non-Sterile: Choose sterile tips if you’re working with sensitive samples like cell cultures or DNA. For general lab work, non-sterile tips are usually sufficient.
Attaching the Tip
- Firm Attachment: Attach the tip firmly onto the pipette shaft. Push the pipette straight down into the tip to ensure a tight seal, but avoid using excessive force which might damage the pipette or the tip.
- Check for Seal: After attaching, check for a good seal by aspirating a small amount of air or liquid. If you notice air bubbles or inconsistent volumes, the seal might be compromised.
Ejecting the Tip
- Using the Ejector: To eject a used tip, simply press the tip ejector button on your pipette. This should release the tip directly into a waste container.
- Avoid Contamination: Never touch the tip ejector with contaminated gloves, and avoid touching the tip itself. This helps prevent contamination of your samples and the pipette.
Preventing Contamination
- Change Tips Between Samples: Always change the tip between different samples to prevent cross-contamination.
- Handling Tips: Handle tips with clean gloves and avoid touching the inside of the tip or the part that attaches to the pipette.
Storage and Handling of Tips
- Proper Storage: Store tips in a clean, dry place to prevent contamination.
- Handling Bulk Tips: If using bulk tips, use clean tweezers or a similar tool to handle them, especially if they are not individually wrapped.
By carefully selecting and properly using pipette tips, you can ensure the accuracy and integrity of your pipetting. Remember, the right tip is as crucial as the pipette itself in achieving precise and reliable results in your laboratory experiments.
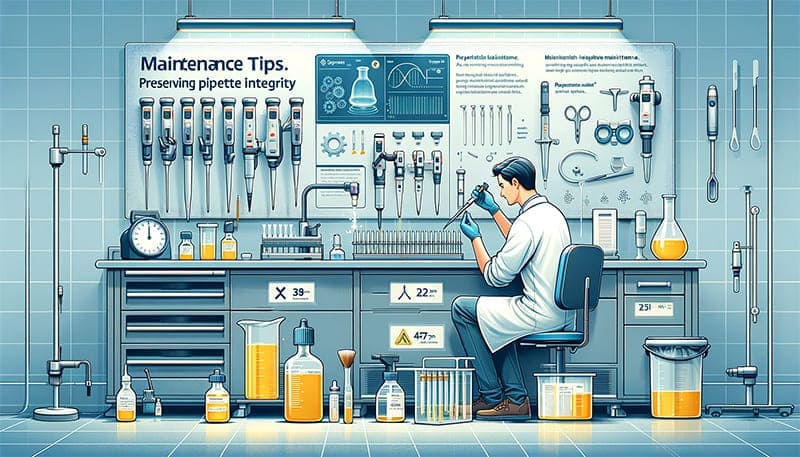
Maintenance Tips: Preserving Pipette Integrity
Proper maintenance of pipettes is essential to ensure their longevity and accuracy. Here are some key tips for maintaining your pipettes:
Avoid Harsh Chemicals
- Chemical Exposure: Be cautious about exposing pipettes to harsh chemicals. Certain solvents and corrosive liquids can damage the pipette’s components, affecting its functionality.
- Cleaning Agents: Use mild detergents and solvents recommended by the pipette manufacturer for cleaning. Avoid using abrasive materials or overly aggressive cleaning agents.
Proper Storage
- Upright Position: Store pipettes in an upright position in a stand or holder. This prevents liquids from entering the body of the pipette, which can damage internal components and affect calibration.
- Environment: Store pipettes in a clean, dry, and stable environment. Extreme temperatures and humidity can adversely affect the materials and calibration.
Regular Checks for Wear and Tear
- Visual Inspection: Regularly inspect your pipette for any signs of wear or damage, such as cracks, chips, or discoloration.
- Functionality Check: Test the pipette’s functionality periodically. Check for smoothness in the plunger’s movement and consistency in the volumes dispensed.
- Seals and O-Rings: Inspect the seals and O-rings for any signs of degradation. These components are crucial for maintaining a proper seal and ensuring accurate pipetting.
Cleaning and Decontamination
- Regular Cleaning: Wipe down the exterior of the pipette regularly with a lint-free cloth dampened with a suitable cleaning solution.
- Decontamination: If working with biohazardous or radioactive materials, decontaminate the pipette according to your laboratory’s safety protocols.
- Disassembly for Cleaning: For thorough cleaning, some pipettes can be disassembled. However, this should be done following the manufacturer’s instructions to avoid damaging the pipette.
Calibration and Service
- Regular Calibration: Send your pipettes for professional calibration at intervals recommended by the manufacturer or your quality control program.
- Professional Service: For any repairs or technical issues, use professional service providers recommended by the manufacturer.
Record Keeping
- Maintenance Log: Keep a record of all maintenance activities, including cleaning, calibration, and repairs. This helps in tracking the pipette’s performance over time and planning for future maintenance.
By following these maintenance tips, you can significantly extend the lifespan and maintain the accuracy of your pipettes. Regular maintenance not only ensures reliable performance but also prevents potential issues that could arise from neglected care. Remember, a well-maintained pipette is a reliable partner in your scientific endeavors.

Troubleshooting Common Issues in Pipetting
Even with proper technique and maintenance, pipetting can sometimes be challenging. Understanding how to troubleshoot common issues is essential for maintaining accuracy and efficiency in your work. Here are some typical pipetting problems and their solutions:
Air Bubbles
- Cause: Air bubbles can form if the pipette tip is not fully submerged in the liquid, or if the plunger is released too quickly.
- Solution: Ensure the tip is properly submerged when aspirating liquid. Release the plunger slowly and smoothly. If bubbles form, dispense the liquid back into the container and repeat the aspiration more carefully.
Inconsistent Volumes
- Cause: This issue may arise from an improper seal between the pipette and tip, a damaged pipette, or incorrect volume settings.
- Solution: Check that the tip is securely attached and replace it if necessary. Inspect the pipette for damage, especially the tip holder and O-rings. Ensure that the volume setting is correct and the pipette is calibrated.
Difficulty in Aspirating or Dispensing
- Cause: A clogged tip, damaged pipette, or issues with the internal mechanism can cause difficulties in aspirating or dispensing.
- Solution: Replace the tip to see if it resolves the issue. If the problem persists, inspect the pipette for damage or contamination. Consider having the pipette serviced if internal problems are suspected.
Leakage
- Cause: Leakage can occur if the tip is not properly fitted, if there’s damage to the tip or pipette, or if there’s a problem with the seals.
- Solution: Ensure the tip is correctly fitted. Inspect the pipette and tip for cracks or damage. Check and replace seals and O-rings if they are worn out.
Contamination
- Cause: Using the same tip for different liquids or improper handling can lead to contamination.
- Solution: Always use a new tip for different liquids. Handle tips carefully to avoid touching their inner surfaces. Use filter tips if working with sensitive samples.
Calibration Issues
- Cause: Over time or after heavy use, pipettes can lose their calibration.
- Solution: Regularly calibrate your pipette as per the manufacturer’s recommendations. If you suspect calibration issues, perform a quick accuracy check using a calibrated balance and distilled water.
Ergonomic Discomfort
- Cause: Prolonged pipetting or improper handling can lead to ergonomic strain.
- Solution: Ensure you are using the pipette with the correct posture. Take regular breaks during long pipetting sessions, and consider using pipettes designed with ergonomic features.
By effectively troubleshooting these common issues, you can enhance the reliability of your pipetting technique and the overall success of your laboratory experiments. Remember, understanding your tools and how to address their quirks is a key part of becoming proficient in lab work.

Record Keeping: A Critical Aspect of Pipette Management
In any laboratory setting, especially those under strict regulatory scrutiny, meticulous record keeping of pipette use is essential. Accurate logs play a crucial role in ensuring the reliability of experimental results and maintaining compliance with quality standards. Here’s what should be included in your pipette record-keeping system:
Importance of Record Keeping
- Quality Assurance: Detailed records help in tracking the performance and accuracy of pipettes over time, ensuring high-quality results.
- Regulatory Compliance: For labs under regulatory oversight (e.g., in pharmaceutical or clinical diagnostics), maintaining proper records is a legal requirement.
- Troubleshooting and Audits: Records provide valuable information during troubleshooting and are essential during internal or external audits.
What to Record
- Cleaning Logs: Keep a record of when and how the pipettes were cleaned. Include details about the cleaning agents used and any special cleaning procedures followed.
- Maintenance Logs: Document regular maintenance activities, including routine checks for wear and tear, replacement of parts like O-rings and seals, and any other servicing activities.
- Calibration Records: Maintain detailed records of calibration dates, the methods used for calibration, the results of the calibration checks, and any adjustments made. This is particularly important for pipettes used in quantitative experiments.
- Repair Logs: If a pipette has been repaired, keep a detailed record of the nature of the repair, who performed it, and the date it was completed. Include any parts that were replaced.
Best Practices for Record Keeping
- Consistency: Ensure that records are kept consistently and in a standardized format. This makes it easier to review and interpret the records.
- Digital Records: Utilize digital record-keeping systems when possible, as they are more durable, searchable, and easier to back up than paper records.
- Accessibility: Keep the records in an easily accessible place, both for regular users of the pipettes and for individuals performing audits or inspections.
- Training: Ensure that all personnel who use or maintain the pipettes are trained in proper record-keeping procedures.
Periodic Review
- Regular Audits: Periodically audit your records to ensure completeness and accuracy. This also helps in identifying any patterns or issues with pipette performance.
By diligently maintaining records of pipette use, cleaning, maintenance, calibration, and repairs, you can ensure the integrity of your laboratory work and adherence to the highest standards of scientific practice. Good record-keeping is not just about compliance; it’s a fundamental component of professional laboratory management.

Environmental Factors: Their Impact on Pipetting Accuracy
Environmental conditions such as temperature and humidity play a significant role in the accuracy of pipetting. Understanding these factors and how to mitigate their effects is crucial for maintaining precision in your laboratory work.
Temperature Effects
- Impact on Liquids: Temperature can affect the viscosity and density of liquids, impacting the volume drawn up by the pipette. Warmer temperatures can make liquids less viscous, potentially leading to drawing up more liquid than intended.
- Pipette Materials: The materials of the pipette can expand or contract with temperature changes, affecting calibration and accuracy.
- Mitigation Strategies:
- Temperature Control: Maintain a consistent laboratory temperature, ideally within standard room temperature ranges (around 20-25°C or 68-77°F).
- Allowing Temperature Equilibration: Let liquids and pipettes acclimate to room temperature before use if they have been stored in a different temperature environment.
- Regular Calibration Checks: Perform more frequent calibrations if working in environments with significant temperature fluctuations.
Humidity Effects
- Impact on Liquid Evaporation: High humidity can reduce the rate of evaporation of liquid from the tip, while low humidity can increase it. This evaporation can affect the accuracy of the dispensed volume.
- Condensation: In high humidity environments, condensation can form inside pipette tips or on the exterior of the pipette, leading to measurement errors.
- Mitigation Strategies:
- Humidity Control: Use dehumidifiers or air conditioners to maintain a stable humidity level in the lab, ideally between 40% and 60% relative humidity.
- Use of Barrier Tips: When working in highly variable humidity conditions, consider using barrier tips to minimize the impact of evaporation and condensation on your samples.
Other Environmental Considerations
- Altitude: Laboratories located at high altitudes may experience lower air pressure, which can affect pipetting accuracy. Calibration adjustments may be necessary in these environments.
- Air Quality: Dust and other particulates in the air can clog pipette tips or contaminate samples. Ensure good air filtration systems are in place in the lab.
By being aware of these environmental factors and implementing strategies to mitigate their effects, you can enhance the accuracy and consistency of your pipetting. Regular monitoring of laboratory conditions and adjusting your pipetting technique accordingly are key steps in ensuring the reliability of your experimental results.
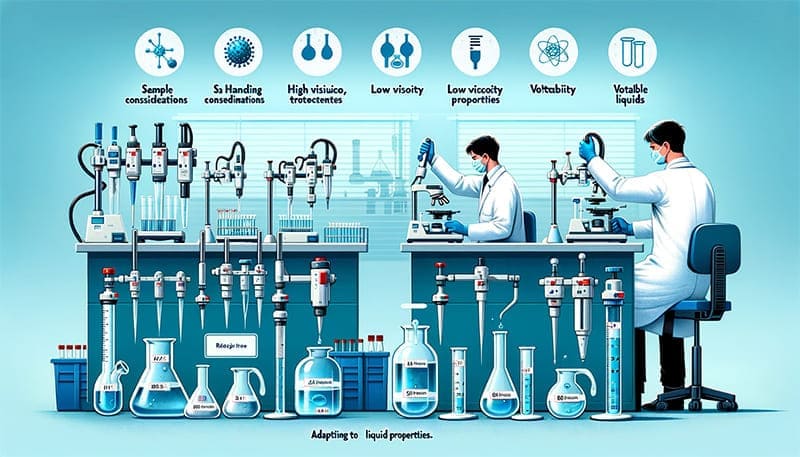
Sample Handling Considerations: Adapting to Liquid Properties
The physical properties of the liquid being pipetted, such as viscosity, volatility, and surface tension, can significantly influence pipetting technique and accuracy. Understanding how to adapt your pipetting method to these properties is essential for precise liquid handling.
Viscosity
- High Viscosity Liquids: Liquids with high viscosity, such as glycerol or oils, flow slowly and require a modified pipetting technique.
- Slow Aspiration and Dispensing: Aspirate and dispense these liquids slowly to ensure accurate measurement.
- Reverse Pipetting Technique: Consider using the reverse pipetting technique for viscous liquids. This involves drawing up more liquid than needed and dispensing the desired volume, leaving the excess in the tip.
- Low Viscosity Liquids: These include water-like liquids, which can be handled with standard pipetting techniques.
Volatility
- Handling Volatile Liquids: Liquids like ethanol or acetone evaporate quickly, which can lead to inaccuracies.
- Pre-wetting the Tip: Aspirate and dispense the liquid a few times before taking the actual measurement to saturate the air inside the tip and reduce evaporation.
- Rapid Processing: Work quickly with volatile liquids to minimize the time they spend in the pipette tip.
Surface Tension
- Impact on Pipetting: Liquids with different surface tensions may cling to the pipette tip differently, affecting the volume delivered.
- Technique Adjustment: You might need to adjust your technique slightly for liquids with significantly higher or lower surface tension than water.
Temperature Effects on Liquid Properties
- Temperature Dependence: Remember that the viscosity and volatility of liquids can change with temperature. Make sure liquids are at room temperature for consistent pipetting, or adjust your technique to compensate for temperature variations.
Specialized Tips and Equipment
- Use of Filter Tips: For volatile or aerosol-generating liquids, use filter tips to prevent contamination of the pipette.
- Specialized Pipettes: Some pipettes are designed specifically for handling difficult liquids, such as those with high viscosity or volatility. Using these can improve accuracy.
Practice and Calibration
- Practice: Gain experience with different types of liquids to develop a feel for how they behave in a pipette.
- Calibration for Specific Liquids: If you frequently work with a particular type of liquid, consider calibrating your pipettes specifically for that liquid.
By taking into account the properties of the liquid you’re pipetting and adjusting your technique accordingly, you can achieve much greater accuracy and consistency in your measurements. Understanding the behavior of different liquids is a key aspect of skillful pipetting in the laboratory.
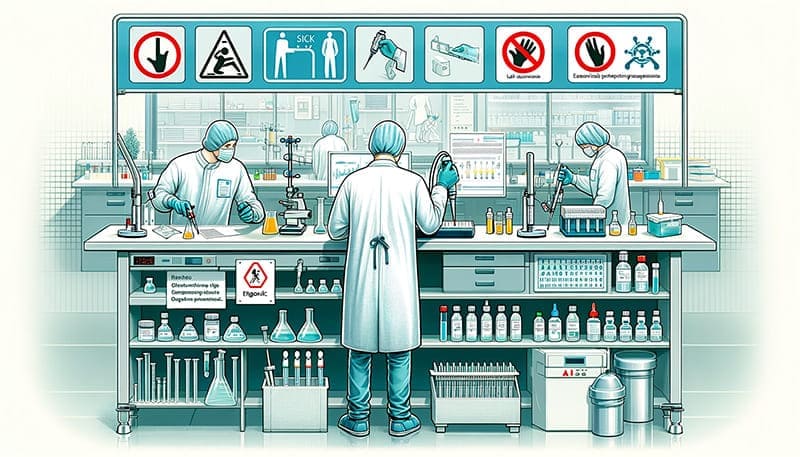
Ergonomics and Safety: Essential Practices in the Lab
Pipetting, especially over long periods, can lead to repetitive strain injuries if not done ergonomically. Additionally, adhering to safety measures is crucial to prevent accidents and ensure a safe laboratory environment. Here’s how to incorporate ergonomics and safety in your pipetting routine:
Ergonomic Practices
- Proper Posture: Maintain a neutral posture to reduce strain. Sit or stand straight, keep your elbows close to your body, and position your arms at a comfortable angle (ideally 90 to 120 degrees).
- Relaxed Grip: Hold the pipette with a relaxed grip. Over-gripping can lead to strain and fatigue. Use pipettes with an ergonomic design that fits comfortably in your hand.
- Minimize Force: Use pipettes that require minimal plunger force to reduce the strain on your thumb and fingers.
- Frequent Breaks: Take regular breaks to stretch and rest your hands and arms. This is crucial during lengthy pipetting sessions.
- Equipment Placement: Place your samples, pipettes, and waste containers within easy reach to avoid overstretching or awkward movements.
- Use of Electronic Pipettes: Consider using electronic pipettes for tasks that require repetitive pipetting. These pipettes can reduce the physical strain associated with manual pipetting.
Safety Measures in the Lab
- Personal Protective Equipment (PPE): Always wear appropriate PPE, such as lab coats, gloves, and safety goggles, to protect against chemical splashes and other hazards.
- Chemical Handling: Be aware of the properties of the chemicals you’re working with. Use fume hoods when handling volatile or hazardous substances.
- Tip Disposal: Dispose of used pipette tips in designated sharps containers or biohazard bins, depending on the nature of the samples you’re handling.
- Avoiding Contamination: Use sterile techniques to prevent contamination of your samples, pipettes, and workspace. This includes using filter tips and sterilizing equipment as needed.
- Workspace Organization: Keep your workspace organized and free of clutter to reduce the risk of accidents, such as spills or broken glassware.
- Emergency Protocols: Be familiar with emergency protocols, including the location of eyewash stations, safety showers, and first aid kits.
- Training and Awareness: Regularly participate in laboratory safety training sessions and stay informed about the best practices in lab safety.
By integrating these ergonomic and safety practices into your daily routine, you can minimize the risk of injury and create a safer and more productive working environment in the lab. Remember, your health and safety are as important as the accuracy of your experimental results.

Advanced Techniques: Pipetting in Specialized Applications
For experienced laboratory professionals, mastering advanced pipetting techniques is crucial for specific applications such as PCR setup, cell culture, and handling sensitive or hazardous materials. These specialized techniques ensure accuracy, efficiency, and safety in complex procedures.
Pipetting in PCR Setup
- Precision is Key: PCR (Polymerase Chain Reaction) requires precise measurements of reagents, including DNA templates, primers, nucleotides, and enzymes.
- Minimizing Contamination: Use filter tips to prevent cross-contamination between samples. Change tips between each reagent to maintain the integrity of your PCR reactions.
- Mixing Techniques: After adding all components, gently mix the PCR reaction by pipetting up and down. Avoid creating bubbles, as they can interfere with the reaction.
- Microvolume Pipetting: PCR often requires handling very small volumes. Ensure your pipette is calibrated for microvolume ranges and practice pipetting small volumes accurately.
Cell Culture Techniques
- Gentle Handling: When working with live cells, pipette gently to avoid damaging the cells. Use a wide-bore pipette tip for cell suspensions to minimize shear stress on the cells.
- Avoiding Contamination: Work in a sterile environment and use sterile techniques to prevent contamination of cell cultures. Sterilize pipettes and use sterile tips.
- Accurate Medium Changes: When changing media, carefully aspirate without disturbing the cell layer. Add fresh media gently along the side of the culture vessel.
- Pipetting Viscous Solutions: Media supplements like serum or high-concentration solutions can be viscous. Adjust your pipetting speed accordingly and use reverse pipetting for more accurate results.
Handling Sensitive or Hazardous Materials
- Use of Safety Equipment: When pipetting hazardous or toxic substances, work in a fume hood and wear appropriate personal protective equipment.
- Disposal of Hazardous Waste: Properly dispose of pipette tips and any other materials that come into contact with hazardous substances.
- Specialized Pipettes: For highly corrosive or toxic chemicals, use pipettes made of materials that can withstand these substances without corroding.
- Segregation of Equipment: Keep separate sets of pipettes and tips for handling hazardous materials to prevent cross-contamination.
High Throughput Pipetting
- Automated Pipetting Systems: For high throughput applications, such as screening assays, consider using automated pipetting systems. These systems improve efficiency and consistency, especially when handling large numbers of samples.
- Multi-Channel Pipettes: Multi-channel pipettes can significantly speed up the process of pipetting into multi-well plates.
By incorporating these advanced pipetting techniques into your laboratory practice, you can handle a wide range of specialized applications with greater precision and confidence. These techniques not only enhance the accuracy and efficiency of your work but also ensure the safety and integrity of your experiments in more complex and sensitive scenarios.

Final Thoughts on Pipette Use: More Than Just a Tool
As we conclude our comprehensive exploration of pipette use in the laboratory, it’s essential to recognize that pipetting is more than just a technical skill—it’s an integral part of the scientific process. The precision and care we apply in pipetting reflect the rigor and dedication inherent in scientific inquiry.
Pipettes are not just tools; they are extensions of the scientist’s hand, bridging the gap between question and discovery. The accuracy of each measurement, the consistency of each repetition, speaks to the reliability of the data gathered and the credibility of the results produced. In many ways, the pipette is a symbol of the meticulous nature of laboratory work, embodying the precision, accuracy, and attention to detail that are the hallmarks of quality scientific research.
Moreover, the focus on ergonomics and safety in pipetting practices underscores the importance of the researcher’s well-being in the laboratory environment. It reminds us that the pursuit of knowledge should not come at the cost of the scientist’s health and safety.
In embracing the full spectrum of responsibilities that come with pipette use—from understanding its mechanics and mastering its techniques, to acknowledging its impact on results and valuing the importance of ergonomics—we embody the true spirit of scientific diligence. Each careful aspiration and precise dispensation is a testament to our commitment to advancing knowledge, understanding, and innovation.
As we continue to push the boundaries of what is possible in the laboratory, let us carry forward the respect and attention to detail that pipetting teaches us. May our work with pipettes inspire us to approach all aspects of our research with the same level of precision and care, driving us ever forward in our quest for discovery and understanding.


