Have you ever found yourself in a laboratory, surrounded by shelves of reagent bottles and wondered, “Am I using these correctly?” or “What are the best practices for handling these essential containers?” The use of reagent bottles in a lab setting is fundamental, but are you aware of the critical guidelines to ensure safety and accuracy in your experiments?
Reagent bottles are more than just glass or plastic containers; they are the guardians of the chemicals that drive your scientific explorations. Understanding their proper usage is not just a matter of lab protocol, but a cornerstone of successful and safe experimentation.
Let’s delve into the intricacies of using reagent bottles, keeping your lab work both safe and efficient.
Understanding Reagent Bottles
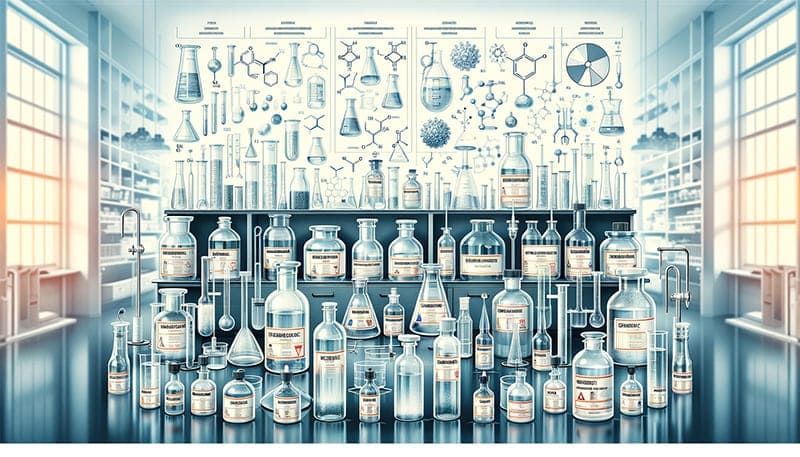
Reagent bottles, typically made from glass or plastic, are used to store and handle various chemical reagents. They come in different shapes and sizes, each suited for specific types of chemicals and laboratory tasks.
A Comprehensive Guide to Reagent Bottle Types and Their Applications
Navigating through the diverse world of reagent bottles can be a daunting task for both new and experienced laboratory personnel. Understanding the different types, materials, and specific uses of each bottle is crucial for maintaining safety and efficiency in the lab. The following table provides a detailed overview of various reagent bottles, helping you make informed decisions for your laboratory needs.
Here’s how the table can be structured:
| Type of Reagent Bottle | Material | Common Uses | Features | Safety Considerations |
|---|---|---|---|---|
| Standard Laboratory Bottle | Glass (Borosilicate) | Storing solvents, acids, and standard reagents | Heat resistant, chemically inert | Handle with care to avoid breakage |
| Plastic Reagent Bottle | Polyethylene (PE), Polypropylene (PP) | Storing biological samples, less reactive chemicals | Lightweight, shatterproof | Not suitable for strong solvents or acids |
| Dropper Bottle | Glass, Plastic | Dispensing small quantities of reagents | Built-in dropper for controlled dispensing | Ensure tight closure to prevent contamination |
| Wash Bottle | LDPE (Low-Density Polyethylene) | Dispensing distilled water or washing solutions | Flexible, squeeze to dispense | Not for storing reactive or hazardous chemicals |
| Media Bottle | Glass, Autoclavable Plastic | Culture media storage, autoclaving solutions | Sterilizable, airtight | Handle gently, especially when full |
| Safety Coated Bottle | Safety-Coated Glass | Storing hazardous or volatile substances | Protective coating to contain spills if broken | Regularly inspect for damage to coating |
| Amber Bottle | Amber Glass | Light-sensitive chemicals like photo-sensitive reagents | Protects contents from UV and light exposure | Store away from direct light to maintain integrity |
| Volumetric Flask | Glass | Preparing precise standard solutions | Marked for exact volume measurements | Use for intended purpose only, not for general storage |
| Graduated Cylinder Bottle | Glass, Plastic | Measuring and mixing liquids | Graduated markings for volume assessment | Ensure accurate reading at eye level |
This table serves as a handy reference for selecting the appropriate reagent bottle for different laboratory applications. Remember, the right choice of bottle not only ensures the safety and integrity of your experiments but also contributes to smoother and more efficient laboratory operations. Stay informed and choose wisely to maintain the highest standards of laboratory practice.
Essential Safety and Handling Guidelines for Reagent Bottles in Laboratories
The use of reagent bottles, which are containers in laboratories for storing and dispensing chemical reagents, involves several important precautions:
- Clear Labeling: Reagent bottles should have clear and readable labels indicating the reagent’s name, concentration, volume, and other relevant information. This is crucial to prevent confusion and misuse.
- Sealing: Ensure good sealing to prevent the reagent from leaking, evaporating, or getting contaminated. Check the bottle cap before use to make sure it’s securely tightened.
- Clean and Dry: Keep the reagent bottles clean and dry to avoid contamination or degradation of the reagents. Clean them before use and ensure they are dry before filling.
- Storage Environment: Store the reagent bottles in a dry, cool, well-ventilated, and light-protected area to maintain the stability and effectiveness of the reagents. Avoid direct sunlight and high temperatures.
- Handle with Care: Handle reagent bottles gently to avoid violent shaking or impact, which could damage the bottle and its contents.
- Appropriate Dispensing: Use the correct tools, like droppers or pipettes, to dispense the reagent. Take only the required amount to prevent waste and cross-contamination.
- Safety with Hazardous Reagents: For hazardous reagents, such as corrosive, toxic, or flammable substances, take appropriate safety precautions and wear protective gear.
- Disposal: Dispose of used reagent bottles and leftover reagents according to laboratory waste disposal standards to prevent environmental and health hazards.
- Regular Inspection: Laboratory managers should regularly check the condition of reagent bottles, including label clarity and reagent integrity, to address any issues promptly, ensuring accurate and reliable experimental results.
- Training and Guidance: New laboratory personnel or students should receive training and guidance on the correct use and precautions for handling reagent bottles to prevent accidents or damage.
Correct use of reagent bottles is crucial for ensuring the accuracy of experimental results and maintaining safety in the laboratory. Adhering to these precautions and following laboratory protocols can enhance the efficiency and quality of laboratory work.
Compatibility of Reagents with Bottle Materials
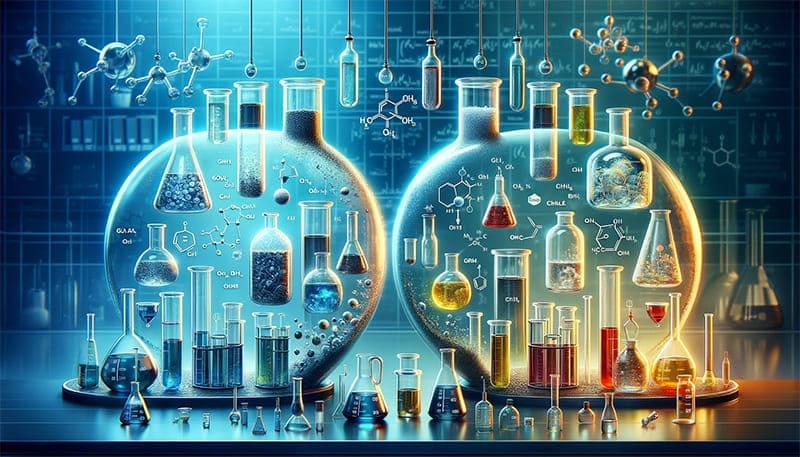
An often-overlooked yet critical aspect of laboratory safety and efficiency is understanding the compatibility of reagents with their storage materials. The interaction between a reagent and its container can have significant implications for both the stability of the chemical and the integrity of the bottle. Here’s a deeper look into how different reagents interact with glass and plastic materials:
Glass Bottles
- Chemical Reactivity: Glass, especially borosilicate glass, is known for its chemical inertness. This makes it ideal for storing a wide range of chemicals, including acids, bases, and organic solvents.
- Solvent Properties: Glass is resistant to most solvents, but hydrofluoric acid and strong alkaline solutions can etch glass.
- Leaching Potential: Glass has a very low potential for leaching, making it suitable for sensitive applications where purity is crucial. However, some types of glass can release alkali ions into very acidic or basic solutions.
Plastic Bottles
- Material Varieties: Common plastics used include polyethylene (PE), polypropylene (PP), and polytetrafluoroethylene (PTFE).
- Chemical Compatibility: Plastics are generally resistant to weaker acids and bases but can be degraded by strong solvents like acetone, benzene, and chloroform.
- Reactivity with Organic Solvents: Certain plastics are prone to swelling, cracking, or permeation when exposed to organic solvents.
- Leaching Issues: Plastic bottles may leach additives like plasticizers into stored chemicals, particularly when storing organic solvents. This can be a concern for experiments requiring high-purity reagents.
Selecting the Right Material
- Nature of the Reagent: Consider the chemical nature of the reagent. For instance, use glass for most solvents and acids, while certain plastics can be used for less reactive or less sensitive materials.
- Concentration and Volume: The concentration and volume of the reagent also play a role. High concentrations of aggressive chemicals are better stored in glass.
- Duration of Storage: For short-term storage or less sensitive applications, plastics may suffice. However, for long-term storage or high-purity needs, glass is often preferable.
Special Considerations
- Temperature Sensitivity: Both glass and plastics have temperature limits. Avoid using plastic bottles at high temperatures.
- UV Sensitivity: Some chemicals are sensitive to light. In such cases, amber glass bottles can offer protection against UV and visible light.
Handling and Disposal of Broken or Damaged Reagent Bottles
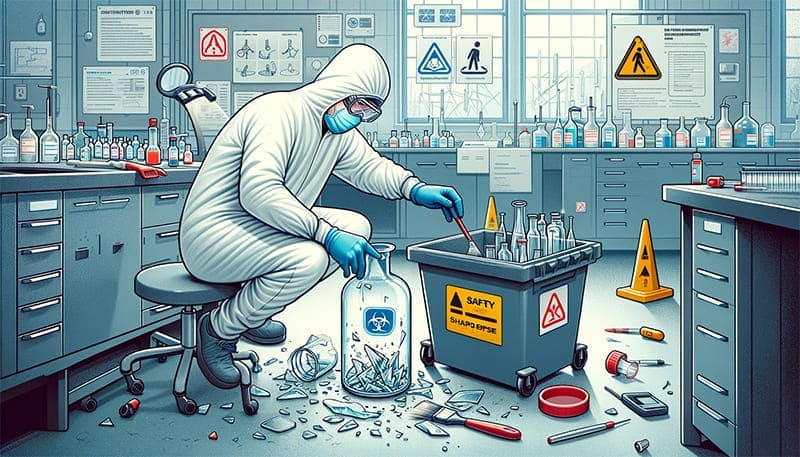
A critical aspect of laboratory safety involves the proper handling and disposal of broken or damaged reagent bottles. Whether glass or plastic, these containers can pose significant safety risks if not managed correctly. Here are essential guidelines for dealing with such situations:
Handling Broken Glass Bottles
- Immediate Response: Upon breakage, secure the area to prevent others from entering and potentially getting injured.
- Personal Protective Equipment (PPE): Wear appropriate PPE, such as safety gloves and goggles, before handling broken glass to protect against cuts and exposure to chemicals.
- Containment and Cleanup: Use a brush and dustpan, not your hands, to collect broken glass pieces. If the bottle contained hazardous chemicals, follow your lab’s spill response protocol.
- Disposal: Place the broken glass in a designated sharps container. Never use regular waste bins as this can harm sanitation workers.
Managing Damaged Plastic Bottles
- Inspection for Leaks: Check for any cracks or leaks. If a leak is found, transfer the remaining contents to a new, undamaged bottle.
- Handling Chemical Spills: In case of a chemical spill, follow the lab’s chemical spill procedure, which typically involves neutralizing and absorbing the chemical before disposal.
- Disposal of Plastic: Dispose of damaged plastic bottles in a container designated for plastics. If the bottle contained hazardous material, it should be treated as hazardous waste.
General Safety Considerations
- Ventilation: Ensure good ventilation during the cleanup of broken bottles, especially if the contents were volatile or hazardous.
- Reporting: Always report the breakage to your laboratory supervisor or safety officer, especially if it involved hazardous materials.
- Record Keeping: Maintain a record of the incident, including details of the breakage and the steps taken for cleanup and disposal.
Disposal of Chemical Residues
- Hazardous Materials: For bottles containing hazardous materials, any residues must be treated as hazardous waste and disposed of according to your institution’s waste disposal guidelines.
- Non-Hazardous Materials: Residues from non-hazardous materials should still be handled carefully and disposed of in accordance with lab protocols.
Training and Preparedness
- Regular Training: Ensure that all lab personnel are trained in handling and disposal procedures for broken or damaged reagent bottles.
- Emergency Kits: Maintain readily accessible spill kits with materials like absorbents, neutralizers, and containment tools for quick response.

Best Practices for Cleaning and Sterilizing Reagent Bottles
Maintaining cleanliness and sterility of reagent bottles is crucial for preventing contamination and ensuring the accuracy of experimental results. Here’s a detailed guide on the effective cleaning, sterilizing, and drying processes for reagent bottles, tailored to different types of contaminants and reagents:
Cleaning Reagent Bottles
- Emptying the Bottle: Ensure all residues are removed. For hazardous chemicals, follow specific disposal guidelines.
- Rinsing: Rinse the bottle with distilled water. If the bottle contained non-hazardous chemicals, a few rinses should suffice.
- Detergent Cleaning: For stubborn residues, use a mild laboratory detergent and warm water. Gently scrub with a bottle brush if necessary.
- Rinse Again: Thoroughly rinse the bottle several times with distilled water to remove any detergent residues.
Sterilizing Glass Reagent Bottles
- Autoclaving: For glass bottles, autoclaving is the most effective method. Place the bottles in an autoclave and run a standard sterilization cycle.
- Dry Heat Sterilization: Another option for glass bottles is dry heat sterilization using a hot air oven.
Sterilizing Plastic Reagent Bottles
- Chemical Sterilization: Use chemical sterilants like ethylene oxide for plastics that cannot withstand high temperatures.
- UV Sterilization: Some labs use UV light for sterilizing plastic bottles, although this method is less effective for penetrating surfaces.
Drying Process
- Air Drying: After cleaning and sterilizing, let the bottles air dry completely in a dust-free environment.
- Oven Drying: For quicker drying, glass bottles can be placed in a drying oven.
- Avoiding Contamination: Ensure that the drying area is free from potential contaminants.
Dealing with Specific Contaminants
- Organic Residues: For organic residues, rinsing with an appropriate organic solvent before the standard cleaning process can be effective.
- Inorganic Salts: If inorganic salts are present, soaking in an acid solution like dilute hydrochloric acid, followed by thorough rinsing, may be necessary.
Tips for Effective Cleaning
- Regular Maintenance: Clean reagent bottles immediately after use to prevent residues from hardening.
- Label Removal: Remove all labels and adhesive residues before cleaning.
- No Cross-Contamination: Use separate cleaning tools for different types of chemicals to avoid cross-contamination.
Safety Precautions
- Personal Protective Equipment (PPE): Always wear appropriate PPE, such as gloves and goggles, while cleaning and sterilizing bottles.
- Chemical Handling: Be cautious when handling aggressive cleaning agents or sterilizing chemicals.

Regulatory Compliance and Safety Standards
Adhering to regulatory compliance and safety standards is essential in laboratory settings, particularly when it comes to chemical storage and handling. This section delves into the key aspects of compliance with organizations such as the Occupational Safety and Health Administration (OSHA), the Environmental Protection Agency (EPA), and other relevant safety standards:
OSHA Regulations
- Hazard Communication Standard (HCS): OSHA’s HCS requires laboratories to provide information about the identities and hazards of the chemicals they use. This includes proper labeling and access to Safety Data Sheets (SDS).
- Personal Protective Equipment (PPE): OSHA mandates the use of appropriate PPE to protect lab personnel from exposure to hazardous chemicals.
- Chemical Hygiene Plan (CHP): Laboratories are required to develop and implement a CHP that outlines procedures, equipment, personal protective equipment, and work practices that are capable of protecting employees from the health hazards associated with the chemicals used in the laboratory.
EPA Guidelines
- Resource Conservation and Recovery Act (RCRA): This act governs the disposal of hazardous waste, including certain chemicals stored in reagent bottles.
- Clean Air Act (CAA): Laboratories must ensure that their use and storage of chemicals do not contribute to air pollution, in compliance with the CAA.
Other Relevant Standards
- National Fire Protection Association (NFPA): Compliance with NFPA standards is crucial for handling and storing flammable and combustible materials.
- American National Standards Institute (ANSI): ANSI standards provide guidelines on various aspects of laboratory safety, including chemical storage and handling.
Implementing Compliance Strategies
- Regular Training: Conduct regular training sessions for laboratory personnel on the latest OSHA, EPA, and other relevant safety standards.
- Safety Audits: Perform periodic safety audits to ensure ongoing compliance with these regulations.
- Documentation and Record Keeping: Maintain accurate records of chemicals, safety procedures, training sessions, and compliance efforts.
Creating a Culture of Safety
- Safety Committees: Establish a laboratory safety committee to oversee and enforce safety standards.
- Continuous Improvement: Encourage a culture of continuous improvement in safety practices.
The Role of Laboratory Management
- Responsibility of Managers: Laboratory managers play a crucial role in ensuring compliance with safety regulations and standards.
- Up-to-Date Information: Managers should stay informed about changes in regulations and standards and implement necessary changes in laboratory practices.

Emergency Response to Reagent Spills or Exposure
In a laboratory setting, the potential for spills, leaks, or accidental exposure to hazardous reagents always exists. Having a well-defined protocol and understanding first-aid measures is critical for minimizing risks and ensuring safety. Here’s a guide on how to respond effectively to such emergencies:
Immediate Response to Spills
- Alert and Evacuate: Immediately alert others in the area and evacuate if necessary, especially for large or hazardous spills.
- Assess the Situation: Quickly assess the spill to determine the risk level and appropriate response. Consider the volume, nature of the reagent, and potential hazards.
- Contain the Spill: If safe to do so, contain the spill by using spill kits which may include absorbents, neutralizers, and containment materials.
Handling Minor Spills
- Personal Protection: Equip yourself with appropriate personal protective equipment (PPE), such as gloves, goggles, and lab coats.
- Cleaning Up: Use appropriate materials from the spill kit to neutralize and absorb the spill. Follow specific procedures for the type of reagent spilled.
- Proper Disposal: Dispose of the cleanup materials in accordance with your laboratory’s hazardous waste disposal protocols.
Responding to Major Spills
- Immediate Notification: For major spills, especially of highly hazardous materials, notify emergency responders and laboratory management immediately.
- Evacuation: Evacuate the area and prevent entry until emergency responders declare it safe.
- Post-incident Reporting: Document the spill and the response actions taken, and report to the relevant authorities as required.
First Aid for Chemical Exposure
- Skin Contact: In case of skin contact with a hazardous chemical, rinse the affected area with plenty of water for at least 15 minutes. Remove contaminated clothing carefully.
- Eye Exposure: If a chemical splashes into the eyes, use the eyewash station to rinse the eyes for at least 15 minutes, and seek medical attention immediately.
- Inhalation: If someone inhales hazardous vapors, move them to fresh air immediately and seek medical attention.
Training and Drills
- Regular Training: Conduct regular training sessions on spill response and emergency procedures.
- Practice Drills: Perform practice drills to ensure everyone in the lab knows how to respond efficiently in case of an emergency.
Preparation and Prevention
- Emergency Kits: Ensure spill response kits and first aid supplies are readily accessible and well-stocked.
- Preventive Measures: Implement preventive measures such as secondary containment and proper storage practices to minimize the risk of spills.

Transportation and Handling of Reagent Bottles
Proper transportation and handling of reagent bottles, both within and outside the laboratory, are crucial for safety and compliance. This involves understanding the best practices for packaging, movement restrictions, and legal considerations, especially when dealing with hazardous materials. Here are essential guidelines:
Inside the Laboratory
- Secure Handling: Always use both hands to carry reagent bottles. For larger bottles, consider using a safety carrier or a bottle caddy.
- Minimizing Distance: Transport reagents over the shortest possible distance to reduce the risk of accidents.
- Avoiding Crowded Areas: Transport reagents through less crowded areas of the lab to minimize the potential for collisions or spills.
- Use of Trolleys: For multiple bottles or heavy containers, use a trolley or cart designed for laboratory use.
Outside the Laboratory
- Appropriate Packaging: When transporting reagents outside the lab, use UN-approved shipping containers designed for chemicals. Ensure bottles are tightly sealed and cushioned to prevent breakage.
- Labeling and Documentation: Clearly label all containers with the nature of the contents and hazard symbols. Accompany them with Material Safety Data Sheets (MSDS) and any other required documentation.
- Regulatory Compliance: Comply with local, national, and international regulations for the transport of hazardous materials, including proper classification, labeling, and documentation.
Legal Considerations for Hazardous Materials
- Transport Regulations: Adhere to regulations such as the Department of Transportation (DOT) in the United States or similar agencies worldwide.
- Training Requirements: Ensure that personnel involved in the transportation of hazardous materials are trained and certified as required by relevant regulations.
- Reporting Incidents: Understand the protocols for reporting spills or accidents during transportation as mandated by law.
General Safety Tips
- No Eating or Drinking: Never eat, drink, or smoke while handling or transporting reagent bottles.
- Personal Protective Equipment (PPE): Always wear appropriate PPE, such as gloves and safety goggles, during handling and transport.
- Avoiding Temperature Extremes: Protect reagents from extreme temperatures during transportation. Use insulated containers if necessary.
Special Considerations for Fragile and Volatile Chemicals
- Fragile Chemicals: Use additional padding and stabilization to prevent breakage.
- Volatile Chemicals: Transport in ventilated containers and avoid exposure to heat sources.

Environmental Impact and Sustainability
The use of reagent bottles in laboratories, while essential, comes with environmental responsibilities. Environmental considerations in their use include reducing waste, exploring recycling options, and opting for eco-friendly materials. By adopting sustainable practices, laboratories can significantly reduce their ecological footprint.
Reducing Waste
- Minimizing Use: Opt for the smallest bottle size necessary to reduce waste.
- Bulk Purchases: Whenever possible, buy reagents in bulk and distribute them into smaller, reusable containers to minimize waste.
- Efficient Management: Implement an inventory management system to prevent over-ordering and expiration of reagents.
Recycling Options
- Glass Recycling: Clean glass reagent bottles can often be recycled. Check with local recycling guidelines to ensure proper procedures.
- Plastic Recycling: Identify plastics used in reagent bottles and follow appropriate recycling protocols. Not all plastics are recyclable, so proper sorting is crucial.
- Specialty Recycling Programs: Some manufacturers and suppliers offer take-back or recycling programs specifically for laboratory materials.
Eco-Friendly Materials
- Biodegradable Plastics: Explore options for reagent bottles made from biodegradable plastics to reduce long-term environmental impact.
- Reusable Containers: Whenever possible, opt for reusable containers that can be cleaned and sterilized for repeated use.
- Reducing Harmful Materials: Avoid bottles containing harmful plastics or chemicals that can leach into the environment.
Laboratory’s Environmental Policy
- Developing a Green Policy: Establish a laboratory policy focused on sustainability, addressing areas such as waste management, recycling, and the procurement of eco-friendly materials.
- Training and Awareness: Educate lab staff on environmental impact and sustainable practices to foster a culture of responsibility.
Innovations and Technology
- Research on Sustainable Materials: Encourage research and adoption of innovative materials that offer lower environmental impact without compromising safety and efficiency.
- Collaboration with Suppliers: Work with suppliers to find sustainable solutions for reagent storage and packaging.

Advanced Storage Techniques
Effective storage of reagents is crucial for maintaining their integrity and ensuring the accuracy of experimental results. Advanced storage techniques, including temperature-controlled environments, inert atmospheres, and strategies for long-term storage, can significantly enhance the stability and longevity of reagents. Here’s an exploration of these advanced techniques:
Temperature-Controlled Storage
- Refrigeration: Many reagents require storage at low temperatures to prevent degradation. Refrigerators dedicated to reagent storage should be used, avoiding food refrigerators.
- Freezers: For reagents that need to be stored at sub-zero temperatures, laboratory-grade freezers provide the necessary environment.
- Monitoring: Regularly monitor and record the temperatures of refrigerators and freezers to ensure they remain within the required range.
Inert Atmosphere Storage
- Desiccators: Store moisture-sensitive reagents in desiccators to protect them from humidity.
- Gas Purging: Some reagents require storage under inert atmospheres, such as nitrogen or argon, to prevent oxidation or moisture absorption.
- Sealed Containers: Use airtight containers with appropriate seals to maintain an inert environment.
Strategies for Long-Term Storage
- Darkness and Stability: Store light-sensitive reagents in dark conditions, away from windows or light sources. Ensure the storage area is free from vibrations and other disturbances.
- Container Selection: Choose containers made from materials that are compatible with the reagent and provide a good seal to prevent exposure to air and light.
- Labeling and Documentation: Clearly label each reagent with storage conditions and expiration dates. Maintain proper documentation for tracking and inventory purposes.
Special Considerations
- Segregation: Store incompatible chemicals separately to prevent dangerous reactions in case of spills or leaks.
- Accessibility: Arrange reagents in a way that commonly used items are easily accessible, while less frequently used or more hazardous items are stored securely but accessibly.
- Safety Protocols: Implement and follow strict safety protocols for accessing and handling stored reagents, especially those under special storage conditions.
Regular Inspection and Maintenance
- Routine Checks: Regularly inspect storage areas for any signs of damage, leaks, or other issues that could compromise the integrity of the reagents.
- Maintenance of Equipment: Ensure that all storage equipment, like refrigerators, freezers, and desiccators, are in good working order and undergo regular maintenance.

Frequently Asked Questions (FAQs) About Reagent Bottle Usag
Q1: How often should I replace my reagent bottles?
A1: Reagent bottles should be replaced if they show any signs of damage, such as cracks or chips, or if the bottle has become discolored or clouded. Plastic bottles should be replaced more frequently due to potential leaching issues over time.
Q2: Can I reuse reagent bottles for different chemicals?
A2: Reusing reagent bottles is possible but requires thorough cleaning and sterilization to avoid cross-contamination. Ensure that the material of the bottle is compatible with the new chemical, and always relabel the bottle accurately.
Q3: How should I label reagent bottles correctly?
A3: Labels should include the chemical name, concentration, date of preparation or opening, and the name of the person who prepared it. Labels must be clear, legible, and resistant to fading or smudging.
Q4: What is the best way to store reagent bottles to ensure safety?
A4: Store reagent bottles in a cool, dry place away from direct sunlight and heat sources. Ensure they are stored on stable shelves with appropriate containment in case of spills. Segregate incompatible chemicals.
Q5: How do I dispose of empty reagent bottles?
A5: Glass bottles can often be recycled if they are not contaminated. Contaminated bottles or those that contained hazardous chemicals should be disposed of as hazardous waste following your facility’s protocols. For plastic bottles, check local recycling guidelines.
Q6: Are there special considerations for transporting reagent bottles?
A6: When transporting, use sturdy, leak-proof carriers designed for chemicals. Ensure that bottles are sealed tightly and cushioned to prevent breakage. Follow all regulatory guidelines for transporting hazardous materials.
Q7: How can I safely clean a reagent bottle?
A7: Rinse the bottle several times with distilled water, followed by a suitable solvent if necessary. For stubborn residues, use a mild detergent and then rinse thoroughly. Sterilize if required, and ensure the bottle is completely dry before reuse.
Q8: What should I do in case of a reagent spill?
A8: For minor spills, contain and clean up using appropriate PPE and spill kits. For major spills, evacuate the area and notify emergency personnel. Always follow your laboratory’s spill response plan.
Q9: Can I store reagent bottles in a regular refrigerator?
A9: It is not recommended to store chemicals in a regular food refrigerator. Use a laboratory-grade refrigerator designed for chemical storage, ensuring it’s set at the correct temperature for the stored reagents.
Q10: What precautions should be taken when handling hazardous reagents?
A10: Always wear appropriate PPE, such as gloves and safety goggles. Work in a well-ventilated area or fume hood. Be familiar with the SDS for each hazardous reagent and follow all safety protocols.
Conclusion
In conclusion, mastering the use of reagent bottles is pivotal for any laboratory’s safety and efficiency. This comprehensive guide provides you with the essential knowledge and best practices. Whether you’re a seasoned scientist or new to the lab, always prioritize safety and stay informed about the latest in laboratory practices. For an extensive range of reagent bottles and more valuable insights, visit Glasswaree. Elevate your laboratory standards today by choosing the right tools and adhering to these guidelines!


