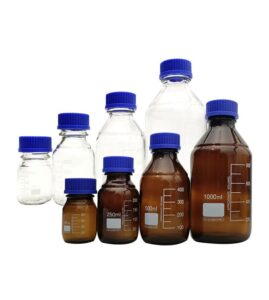
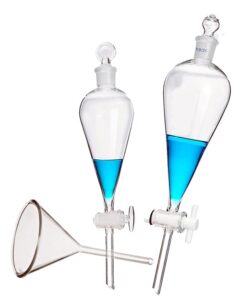
Have you ever wondered how the pristine, clear glassware in laboratories comes into being? From beakers to flasks, each piece of lab glassware is crucial for precise scientific experiments. But what lies behind the creation of these transparent tools of science? How do raw materials transform into vessels of clarity and precision?
The process of lab glassware manufacturing combines ancient glassblowing techniques with modern technological advancements. It’s an intricate dance of physics, chemistry, and artistry, ensuring that each piece of glassware meets the exacting standards required for scientific work. This journey from sand to lab bench is not only fascinating but crucial for the advancement of science.
Let’s dive deeper into this transparent world.
The Art of Precision: Manufacturing High-Quality Laboratory Glassware
Laboratory glassware stands as a cornerstone of scientific research, offering clarity, precision, and reliability in countless experiments and procedures. But what goes into the making of these essential tools? From beakers and flasks to intricate apparatuses, each piece begins its life in the heat of a furnace, shaped by a blend of ancient craftsmanship and cutting-edge technology. This article delves into the meticulous process of laboratory glassware manufacturing, covering material preparation, shaping, and the critical finishing processes that ensure each piece meets the rigorous standards of scientific inquiry.
Material Preparation: The Foundation of Glassware
The journey of laboratory glassware starts with its raw material, primarily silica-based substances like quartz sand. These materials are meticulously ground into a fine powder, mixed with additives like sodium carbonate to lower the melting point, and then placed into a furnace. Here, the mixture is heated to high temperatures, initiating a series of chemical reactions that transform the solid raw materials into molten glass. This stage is crucial, as the purity and composition of the starting materials directly impact the quality and properties of the final glass product.
Shaping the Future: Molding Glassware
Once the glass reaches its molten state, it is ready to be formed into the diverse array of shapes required by laboratories worldwide. This process can involve various techniques, including:
- Cutting: Starting with glass in a more solid form, pieces are cut to specific sizes and shapes, laying the groundwork for further shaping.
- Hot Working: Techniques such as blowing, pressing, and stretching are employed at high temperatures. Blowing involves using air pressure to form the glass into hollow shapes, while pressing shapes the glass under mechanical force, and stretching extends the glass into thin fibers, each technique chosen based on the desired end product’s specific requirements.
These methods require skilled artisans capable of working with precision to achieve the exact dimensions and shapes needed for scientific accuracy.
Finishing Touches: Processing and Treating Glassware
After shaping, glassware must undergo several finishing processes to enhance its usability and durability:
- Hand Finishing: Includes polishing and cutting to remove any imperfections and achieve a visually appealing finish.
- Machine Processing: Utilizes precision machinery to ensure that each piece meets strict dimensional tolerances.
- Cold Working: Techniques like etching with acids are applied to refine surface properties or add detailed markings.
- Heat Treatment: Such as annealing, where glass is slowly cooled to relieve internal stresses, ensuring the glassware’s strength and resistance to thermal shock.
Each of these steps is vital in producing laboratory glassware that not only meets the aesthetic and practical needs of scientists but also withstands the demanding conditions of laboratory work.
The creation of laboratory glassware is a testament to the fusion of science and craftsmanship. It requires a deep understanding of materials science, mastery over high-temperature processes, and a meticulous approach to quality control. Behind every piece of glassware is a complex process that transforms basic materials into precise tools for scientific discovery. Each step, from material preparation through to the final finishing touches, plays a crucial role in ensuring that laboratory glassware can meet the exacting standards required for cutting-edge scientific research.
Ensuring Excellence: Quality Control in Laboratory Glassware Manufacturing
In the realm of laboratory glassware manufacturing, quality control stands as a pivotal element, distinguishing premium products from their lesser counterparts. This critical phase ensures that each piece of glassware not only meets aesthetic standards but also upholds the rigorous demands of scientific precision and reliability. Quality control in this context unfolds in two main stages: during the production process and after the production has been completed. Each stage plays a vital role in ensuring that the final product can be trusted for its intended scientific applications.
In-Process Quality Control: The First Line of Defense
Quality control during the manufacturing process is integral to identifying and rectifying potential flaws at their inception. This proactive approach encompasses a range of checks and balances, from monitoring the raw materials for purity to ensuring the accuracy of the glassblowing techniques. Technicians and craftsmen closely observe the melting and molding processes, making adjustments in real-time to correct any deviations from the desired specifications. This level of vigilance ensures that inconsistencies are addressed promptly, preventing minor issues from becoming significant defects.
Post-Production Quality Assurance: The Final Verdict
Once the glassware has been shaped and treated, it enters the second phase of quality control. This stage involves a thorough inspection of each piece to verify its integrity and compliance with stringent scientific standards. Advanced measurement tools and meticulous visual inspections are employed to check for any imperfections, such as uneven thickness, bubbles, or stress fractures. Glassware must also pass tests for chemical resistance and durability under various conditions, ensuring it can withstand the rigorous environments of scientific experimentation. Only after passing these comprehensive evaluations is the glassware deemed ready for use in the laboratory.
The Impact of Quality Control on Scientific Discovery
The rigorous quality control protocols in laboratory glassware manufacturing are not merely procedural. They are foundational to the trust and reliability placed in these tools by scientists worldwide. By ensuring that each piece of glassware meets high standards of quality, manufacturers empower researchers to conduct their work with confidence, knowing that their experiments’ accuracy and reproducibility are supported by the integrity of their tools.
Quality control in laboratory glassware manufacturing is an essential component of the scientific apparatus industry. It bridges the gap between craftsmanship and scientific precision, ensuring that every piece of glassware can meet the demanding standards of the scientific community. Through meticulous in-process supervision and comprehensive post-production inspections, manufacturers uphold the integrity of their products, contributing to the advancement of scientific discovery and innovation.
Minimizing Flaws: Addressing Common Defects in Laboratory Glassware Production
The production of laboratory glassware is a complex process that combines the art of glassblowing with the precision of scientific instrument manufacturing. Despite the high standards of craftsmanship and technology applied, the process is susceptible to various defects that can compromise the quality of the final product. Identifying these potential flaws and implementing strategies to minimize their occurrence is crucial for manufacturers aiming to uphold the integrity and reliability of their laboratory glassware. This section explores the common defects encountered during production and outlines effective control measures to mitigate these issues.
Identifying Common Defects
The most prevalent defects in laboratory glassware production include bubbles or stones within the glass, uneven wall thickness, and stress fractures. Bubbles can occur when air is trapped during the melting process, while stones are typically the result of impurities in the raw materials. Uneven wall thickness can lead to inconsistent thermal resistance, making the glassware prone to breakage under temperature changes. Stress fractures are often the result of improper cooling, leading to internal tensions within the glass.
Implementing Control Measures
To minimize these defects, manufacturers must employ a multifaceted approach, focusing on raw material quality, process control, and continuous monitoring.
- Raw Material Quality: Ensuring the purity and appropriate particle size of the raw materials can significantly reduce the likelihood of impurities leading to bubbles and stones. Rigorous quality checks of raw materials are essential.
- Process Control: Precise control over the melting and cooling temperatures can prevent many common defects. Advanced temperature control systems and careful monitoring during the annealing process can reduce the occurrence of stress fractures and ensure even wall thickness.
- Continuous Monitoring: Employing real-time monitoring technologies during production allows for the immediate identification and correction of process deviations that could lead to defects. This proactive approach enables adjustments to be made on the fly, significantly reducing the rate of defective products.
Training and Expertise
Beyond technological solutions, the expertise of the workforce plays a critical role in minimizing defects. Comprehensive training programs for glassblowers and technicians emphasize the importance of craftsmanship and attention to detail. Skilled artisans can often detect and correct minor issues before they become significant defects, further enhancing the overall quality of the production process.
Striving for Perfection in Glassware Manufacturing
While completely eliminating defects in laboratory glassware production may be an ideal rather than a reality, implementing stringent quality control measures, focusing on process optimization, and fostering a culture of excellence among the workforce can significantly reduce their occurrence. By addressing common defects through proactive strategies, manufacturers can ensure that their glassware meets the high standards required for scientific research, maintaining their reputation for quality and reliability in the scientific community.
Safeguarding Science: The Importance of Packaging in Laboratory Glassware Manufacturing
Packaging plays a critical role in the lifecycle of laboratory glassware, serving as the guardian of the product from the manufacturer to the laboratory bench. The packaging process is not merely about placing the glassware in a box; it involves a meticulous procedure designed to protect these precision tools from damage during storage and transit. Ensuring the integrity of laboratory glassware through effective packaging is crucial for manufacturers who aim to deliver their products in pristine condition, ready for the rigorous demands of scientific research.
Strategic Packaging: Beyond the Box
The packaging of laboratory glassware involves more than just selecting the right-sized box. It requires a strategic approach, incorporating materials and techniques that provide maximum protection. Each piece of glassware is individually wrapped in protective materials, such as bubble wrap or foam, to cushion against shocks and vibrations encountered during shipping. The choice of packaging materials is pivotal, focusing on cushioning, moisture resistance, and the ability to withstand various temperatures and pressures.
Attention to Detail: Ensuring Safe Delivery
In addition to selecting the right packaging materials, manufacturers must adhere to specific practices during the packaging process. This includes ensuring that each item is securely fastened within the package to prevent movement that could lead to collisions and breakages. The use of compartmentalization within the box, through dividers or custom-fitted inserts, helps keep each piece of glassware in place, minimizing the risk of damage. Furthermore, clear labeling and handling instructions on the exterior of the package are essential to inform handlers of the fragile contents within, encouraging careful handling during transit.
The Final Check: Quality Control in Packaging
The packaging process also includes a final quality control check to ensure that the glassware is defect-free before it is sealed and sent off. This step is crucial, as it serves as the last line of defense in identifying any potential issues that could compromise the glassware’s integrity. By incorporating this final inspection, manufacturers can confidently guarantee that their products are not only scientifically precise but also securely packaged to withstand the journey to their final destination.
The Role of Packaging in Scientific Precision
The meticulous approach to packaging laboratory glassware underscores its importance in maintaining the quality and integrity of these essential scientific tools. Effective packaging ensures that the glassware arrives at its destination in the same condition it left the manufacturing facility, ready to contribute to the advancements of scientific discovery. Manufacturers who prioritize high-quality packaging demonstrate their commitment to excellence and reliability, further establishing their reputation within the scientific community.
Conclusion
In closing, the journey of laboratory glassware from concept to lab bench is a testament to the unwavering dedication to quality and precision. This meticulous process not only underpins scientific discovery but also showcases the harmonious blend of art and science. Let us celebrate the craftsmanship behind each piece of glassware and champion the relentless pursuit of excellence in the scientific community. Embrace the clarity, support innovation, and contribute to the legacy of discovery that laboratory glassware manufacturing brings to the forefront of science. Join us in this quest for perfection, for every experiment begins with the right tool.


