Have you ever wondered about the role of an Erlenmeyer Flask in a laboratory? Why does it have a unique conical shape, and how does that contribute to its function? In the dynamic world of science, every piece of laboratory equipment serves a purpose. Today, let’s turn our focus to the Erlenmeyer Flask, one of the staples of any lab setup.
Erlenmeyer Flasks, also known as conical flasks, were named after the German chemist Emil Erlenmeyer, who designed them in 1860. The unique design of these flasks – a flat base with a conical body and a cylindrical neck – is not just aesthetically pleasing but serves a critical function.
Let’s delve deeper into understanding this unique piece of lab equipment.
The Functions of an Erlenmeyer Flask
Erlenmeyer Flasks are incredibly versatile and serve a range of functions in a laboratory.
1. Mixing and Swirling
The unique conical design of the Erlenmeyer Flask allows it to be easily swirled. This is ideal for mixing solutions or suspending solids in liquids without risk of spillage. The flat base ensures stability during swirling, and the narrow neck minimizes evaporation and prevents the solution from splashing out.
2. Heating Solutions
These flasks can be directly heated, which is useful when you need to heat a liquid or solid for an experiment. The wide base allows for even heat distribution.
3. Titration
An Erlenmeyer Flask is frequently used as the recipient solution flask in titration experiments. Its wide base and narrow neck are perfect for minimizing the loss of solution due to splashing during the addition of the titrant.
4. Culturing Media
In biology, these flasks are used to culture and store organisms, as they can easily be sealed with cotton plugs or rubber stoppers to prevent contamination. The conical shape also allows for easy mixing of the culture by swirling.
Navigating the Basics: How to Use an Erlenmeyer Flask
To maximize the utility of an Erlenmeyer Flask and ensure safety in the lab, it’s essential to understand the proper handling, cleaning, and storage procedures.
Handling: Always use heat-resistant gloves or tongs when handling heated flasks. Ensure that the flask is not cracked or chipped before use. When pouring liquids into the flask, do so slowly to avoid splashes.
Cleaning: After use, the Erlenmeyer Flask should be rinsed thoroughly with a suitable solvent, usually distilled water. If necessary, a soft brush can be used for cleaning the insides.
Storage: After cleaning, the flask should be inverted and allowed to dry before storage. Store it upright in a dry place.
Troubleshooting and Safety Tips
When working with Erlenmeyer Flasks, it’s crucial to keep some safety and troubleshooting tips in mind.
Heating: If the flask needs to be heated, ensure to use a clamp or tongs. Don’t apply heat to a flask with a closed stopper, as this could cause pressure buildup and potential rupture.
Cracking: Avoid rapid temperature changes that can cause the flask to crack.
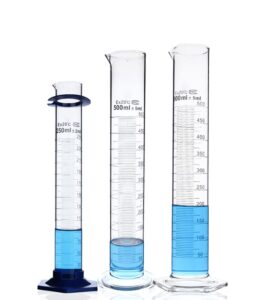
Measurements: Although some Erlenmeyer Flasks have volume markings, they are not meant for accurate measurements. Use a graduated cylinder or volumetric flask for precise volume measurements.
Chemical Compatibility: Not all chemicals are suitable for use
with an Erlenmeyer Flask, especially if the flask is made of glass. Always refer to the material safety data sheet (MSDS) for the chemical to check its compatibility with glass.
Cleaning: To remove stubborn stains or residues, you can use a specialized labware detergent. For some residues, a weak acid or base bath might be necessary.
Advanced Techniques: Pushing the Boundaries with the Erlenmeyer Flask
Once you’ve mastered the basics of handling, cleaning, and storing an Erlenmeyer Flask, you might find it helpful to familiarize yourself with more advanced techniques and applications that involve this ubiquitous piece of lab equipment.
1. Vacuum Filtration: Erlenmeyer Flasks can be utilized in vacuum filtration setups. In such cases, the flask serves as the collection vessel for the filtrate. A vacuum is created inside the flask to draw the fluid through the filter, leaving the solid components behind.
2. Rotary Evaporation: In the process of rotary evaporation, Erlenmeyer Flasks can be employed to collect the solvent after it’s been evaporated and condensed. This technique is common in organic chemistry labs for the purification of products.
3. Boiling Stones: When you’re boiling a liquid in an Erlenmeyer Flask, you can use boiling stones (small, porous stones) to ensure smooth boiling and to prevent the liquid from “bumping” or boiling over.
4. Reflux: In a reflux setup, the Erlenmeyer Flask often serves as the reaction vessel. The conical shape of the flask minimizes the loss of vapors, which condense back into the flask, thereby allowing the reaction to proceed at high temperatures without losing any reactants.
Lab Example: Simple Titration Using an Erlenmeyer Flask
To fully grasp the usage of Erlenmeyer flasks, let’s walk through a simple, hands-on example: a basic acid-base titration. This experiment not only allows you to see the Erlenmeyer flask in action but also practices transferring, mixing, and observing reactions within the flask.
Materials Needed:
- Erlenmeyer Flask
- Burette
- Base Solution (e.g., Sodium Hydroxide)
- Acid Solution (e.g., Hydrochloric Acid)
- pH Indicator (e.g., Phenolphthalein)
- Burette Clamp and Stand
Procedure:
1. Setup: Setup the burette on a stand and clamp it securely. Make sure it is clean, and rinse it with a small amount of base solution. Fill the burette with the base solution.
2. Adding Acid Solution: Pour a known volume of the acid solution into the Erlenmeyer flask. Add a few drops of phenolphthalein to the acid.
3. Titration: Slowly add the base solution from the burette to the Erlenmeyer flask containing the acid. Swirl the flask gently to mix the solutions.
4. Endpoint Detection: Continue adding the base until the color of the solution in the Erlenmeyer flask changes. This color change indicates that you’ve reached the endpoint of the titration.
5. Cleaning Up: Once you’ve completed the titration, clean the Erlenmeyer flask with appropriate lab detergent and warm water. Rinse well and store properly.
This straightforward titration experiment demonstrates the Erlenmeyer flask’s functionality in a typical lab procedure, emphasizing its role as a reaction vessel and its utility in mixing and observing reactions.
Enhancing Your Laboratory Practice: Essential Tools for Working with Erlenmeyer Flasks
To ensure safe and effective use of Erlenmeyer Flasks, it’s worth mentioning some essential lab tools that complement their use:
1. Clamps and Stands: These help in securely holding the flask, especially when heating or during titration.
2. Rubber Stoppers or Cotton Plugs: These are used to seal the flask when growing cultures or when you want to prevent the escape of vapors.
3. Hot Plate or Bunsen Burner: Used for heating the contents of the flask.
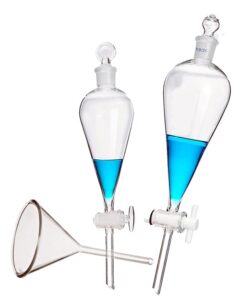
4. Funnel: Helpful for transferring solutions into the flask, especially when dealing with a small opening.
Through understanding the functionality of the Erlenmeyer Flask, you can truly appreciate the role it plays in a laboratory setting. Its versatility in both chemistry and biology makes it one of the most common pieces of lab equipment.
The more you work with an Erlenmeyer Flask, the more comfortable you will become in handling it and recognizing its many applications. Remember, each piece of equipment in a lab has its specific uses, limitations, and safety considerations. Your journey to mastering laboratory techniques involves understanding these elements and applying your knowledge effectively. Happy experimenting!


